News: New Team Members

Monday, May 21, 2007

Posted by Meeta K. Wolff

If you are a regular reader of the Daily Tiffin you might have noticed this article on Friday. If you have a very sharp eye you might have also noticed a new name at the end of the article. Helene from the awesome blog Tartlette has graciously accepted to join us here at the Daily Tiffin. Just as sweet as her blog is Helene herself and she has many facets to her amazing personality. I'll let her tell you a little bit about herself in her own words:

"I was born and raised in France 32 years ago, and moved to the US 10 years to complete a Master's in American History. I met my husband and life changed completely. I have a very strange resume as I am a pastry chef half the week and a certified personal trainer the other half. I befriended the most amazing chef at the French restaurant I was working for and when he retired I quit to follow him. I love fitness and health and got certified in various areas: nutrition, Pilates, Aerobics, ... I think I have found the way to balance the best of both world and I am a happy fish in bright waters!"

It does not end there though. I have the biggest joy in introducing you our next new Team Member. Sabrina from the fantastic YumSugar will be reporting about the latest food trends, discussing important food related topics and sharing some yummilicious recipes with all of us. Sabrina, is energetic and full of life.

"I am the editor of YumSugar.com and enjoy keeping my readers up to date on the latest food trends, news and more. I pride myself on the fact that I has traveled and eaten meals in more than 15 countries. After graduating UC Santa Cruz with a degree in Fine Art/Photography and Computer Science, I began a daily food blog called Pocketpig.com featuring drawings and discussions of every meal I ate. During this time, I lived in Cambridge, England and learned to appreciate the finer points of British cuisine. I also once created a 3ft x 4ft self portrait made entirely out of cake!"

Lookout for Sabrina's yummy posts every other Wednesday.

We've also been trying to optimize our blog for you. On the sidebar you might have noticed a few new sections. These sections aim to keep you informed on interesting topics related to healthy, happy and well balanced family life. The "Blog Hopping" section links you to interesting article we found during our visits to other blogs. If you see something that you think might be of interest for this section let us know. Send us an email and we'll add the link to the section.

Hope you all have a great start to your week!


If you like what we girls do here and would like to vote for us in the Blogger's Choice Awards here. Thanks for your support!


Are you interested in contributing to The Daily Tiffin? Drop us an email: blogmeeta@gmail.com. We look forward to hearing your ideas.

Have A Safe Workout!

Friday, May 18, 2007

Posted by Helene

I love May at the gym. Spring is in the air, people come in with renewed enthusiasm as soon as the first rays of sun appear after the winter blahs. With this new lively attitude I, as the trainer, notice increased injuries and accidents. There are however steps you can take to prepare yourself before, during and after exercise to ensure that you will have a pleasant and safe time improving your health and quality of life.

All the steps and guidelines outlined below may seem common sense for the avid exerciser but you would be surprised of what I see at the gym everyday. I often have to go through these points with my clients in order to prevent performing workouts or moves that might injure them in the long run.

Before even stepping foot into a gym:
- check with your doctor that he approves your starting an exercise program, especially if you have diseases such as diabetes, high blood pressure, recent surgeries or injuries. If you are pregnant, check out this article "The 13 rules of safe pregnancy exercise". If you have recently had a baby and if you exercised throughout your pregnancy and had a normal vaginal delivery, you can safely perform your pregnancy workout within 1 or 2 weeks. If you had a c-section,check with your doctor as most recommends waiting six to eight weeks to exercise. However, walking at an easy pace is encouraged because it promotes healing and helps prevent complications such as blood clots.

- wear comfortable and fitting athletic shoes, don’t forget socks (who likes blisters?), clothes that let you move without cutting circulation (you are at the gym…not a fashion show!)

- don’t forget to bring a water bottle and a towel (less risk of germs from water fountain or club handled linens)

- if you have diabetes, make sure that you have a juice pack close by as well as a few sugar cubes or packets of sugar in case of a severe blood sugar drop. Do not rely on the club’s first aid kit…you would be surprised what you don’t find in them. Same goes if you have asthma, remember to have your inhaler with you. Your body does not react “normally” under workout pressure and may even react differently from one session to the next even if you are doing the same activity.

- never exercise on a empty stomach. Yes, 4 times out of 5, you will be fine and nothing wrong will happen, until that one day when you almost pass out doing basic tricep kickbacks. Forget the myth that you will burn more fat if you workout on an empty tank…you will do just what you car does…break/crash/caput/kaplunk… It is not fun for a trainer and a trainee to stop a session because you are turning pale as aspirin and feel nauseated like it’s New Year’s Day again! If it has been more than 4 hours since your last meal, grab a fruit (apple-banana), a yogurt, a piece of cheese, a couple of crackers with peanut butter: essentially some combination of protein, carbs, and fats. If you are a person on the go, play it safe at the vending machine by choosing the granola bar.

Once you are in the gym:
- if you are new to exercise or have not been going in a while or not regularly, take the time to meet with a personal trainer for a fitness assessment. Two crucial points here: make sure that the person has proper qualifications (you don’t take your dog to a mechanic but a vet). Do not be afraid to meet with a young trainer, experience is always a plus but knowledge and proper practice of body mechanics and exercise programs has nothing to do with age. Talk about your goals, issues, lifestyle, prior surgeries or health issues. Stop her/him in their tracks if they start talking about things you don’t understand, but bear in mind that a lot can be explained through practice.

- if you have an intermediate level, stay safe while working out by asking for assistance on machines you have not used often or never before. Ask gym personnel and trainers if you use correct form, proper weights and proper number of sets and repetitions for the results you want to achieve.

All levels of exercisers should consider these safety tips, before they even step on that treadmill or pick up that dumbbell:
- warm up and stretch: one common mistake is to stretch before muscles are warmed-up. Warm up first and let the blood circulate through your muscles. A warm-up should be done for at least 5-10 minutes at a low intensity. Usually, the warm-up is done by doing the same activity as the cardiovascular workout but at a lower intensity.

- cool down: similar to the warm-up in that it should last 5-10 minutes and be done at a low intensity also. After you have completed your cardiovascular exercise and cooled-down properly, it is important that you stretch the primary muscles used. This helps your performance levels and produce better results, they also drastically decrease your risk of injury.

- exercise frequency: to improve both cardiovascular fitness and to decrease body fat or maintain body fat at optimum levels, you should do cardiovascular exercise at least three days a week. Those of you who are very out of shape and/or who are overweight might need 36 to 48 hours of rest between workouts to prevent an injury and to promote adequate bone and joint stress recovery.

- exercise duration: each time you exercise, try to do at least 20 minutes or more, not including warm up and cool down. Of course, the longer you go, the better you'll condition your cardiovascular system. All beginners, especially those who are out of shape, should take a conservative approach and train at relatively low intensities at first. As you get in better shape, you can gradually increase the duration of time you exercise.

- lifting too much weight: this will contribute to poor form and create injury to other areas of the body in addition to the muscle you're targeting. The safest workout is gradual progressive resistance training.

- too much intensity: forget the old adage of "no pain, no gain" If you're looking for effective weight loss, longer periods of moderately intense workouts are most effective. Short periods of high intensity training are best integrated into a circuit training workout or when used for athletic training. But for the average fitness enthusiast, too much intensity will lead to soreness and keep you away from your workouts while your muscles recover.

Final words? A safe thing to do when you start a health program is to include a mix of cardiovascular exercise, strength training and proper nutrition. Start practicing “push aways”: push yourself away from the dinner table, push away excuses and negativity. Health is a journey not a destination, it must be continued for the rest of your life.


If you like what we girls do here and would like to vote for us in the Blogger's Choice Awards here. Thanks for your support!


Are you interested in contributing to The Daily Tiffin? Drop us an email: blogmeeta@gmail.com. We look forward to hearing your ideas.

This Post was written by Helen from Tartelette


Safety and Care: Kids In The Kitchen

Thursday, May 17, 2007

Posted by Shah cooks


A kitchen is similar to a laboratory and has similar pitfalls and hazards. Just as you would supervise every second of a kid in a lab, every activity in a kitchen has to be monitored.
The three major hazards are fire, knife and hot liquids. These are some of the issues I came across which can be potentially dangerous.

Fire:
* Do not let kids be anywhere near the stovetop, whether it is to peer into their favorite mac n cheese cooking or to watch the cookies rising in the oven. It takes only a moment for an accident to occur so be extra careful while cooking.

Fire:
* Do not let kids be anywhere near the stovetop, whether it is to peer into their favorite mac n cheese cooking or to watch the cookies rising in the oven. It takes only a moment for an accident to occur so be extra careful while cooking.
* Do not try to do too many things at the same time and use the back burner if you have to leave something for simmering.
* Do not use the cabinets on either side of the stove to store anything that kids are used to taking on their own, such as pantry items.
* Do not leave the oven on and leave kids unattended as the door of the oven also gets hot.
* Do not leave kitchen towels or paper towels near the stove even for a second.
* Stock a separate drawer at the kid’s level with plastic cups and plates for their easy access. This would prevent them from precariously balancing on chairs to get breakable utensils.

Sharp Objects:
The knife is a weapon to be wielded with precision and care only as a necessity.
* Do not let kids younger than 8-10 yrs old do anything with the knife.
* Do not keep knives easily accessible and do not keep them in the same drawer as the spoons.
* Knives should be kept away in their own block.
* Do be careful when opening cans with a can opener. The edges are sharp and highly prone to infection especially if they are rusted or the can opener is old. I recently heard about a friend whose husband cut his hand while using a can opener and is still recovering with stitched in his hand.

Hot Liquids:
These can be any liquid or gravy based dish that is on the stove, just off the stove or freshly served on the dining table.
*Ideally, do not keep sauté pans with freshly made sauces near the edges or on the table.
*Do not let kids taste or serve it themselves.

These are just some of the kitchen safety factors to be kept in mind. My friend Meeta has also enumerated very descriptively the pitfalls in a kitchen.


So what is safe for kids to do?
5-7 year olds can comfortably do the following:
*They can peel cucumbers, carrots, potatoes etc for salads and side dishes.
*They can toast bread, and spread jelly or peanut butter on it.
*They can cut cookie shapes out of cookie dough.
*They can spread grated cheese over pizza, quesadillas and toast.
*They can even grate cheese using a box grater which has no sharp edges exposed.
*They can snap off the ends of the beans or wash them under running water.
*They can mix anything together as long as you measure out the proportions. Mixing cake mixes are a snap and they can even pour it out into muffin pans using an ice cream scoop.
* Older kids can even try making their own dressings and flavored cream cheeses.

Though all these warnings tend to scare you off and make you super cautious about kids in the kitchen, it’s manageable if you are there with them. It initiates an interest in food as well as an appreciation for the effort that goes into getting meals on the table.

Kids will remember the time spent in the kitchen with you with fondness later. Everybody will savor the conversation and laughter that flows around as everybody talks and discuses as a family. Some picky eaters may even try eating dishes they helped prepare. The kids will also learn about the different vegetables and its texture, smell, and taste.This is the beginning of interest in science. It is a social exercise that they can draw on during class discussions.

Disclaimer: Some children will progress on different levels. Our age groups are just guidelines. You as the adult should judge what is and is not appropriate for the child cooking. Supervision is key. So please show good judgment in teaching your child to cook.

Some Related links:
Fire safety


If you like what we girls do here and would like to vote for us in the Blogger's Choice Awards here. Thanks for your support!


Are you interested in contributing to The Daily Tiffin? Drop us an email: blogmeeta@gmail.com. We look forward to hearing your ideas.

This Post was written by Mallugirl from Malabar Spices.


Inside the Indian Household - Ginger

Wednesday, May 16, 2007

Posted by Unknown

Fresh Ginger Root
Image courtesy Royalty Free Images from Getty Images


Ginger has a rich history of culinary and medicinal use, throughout Asia as well as the Roman Empire and then to the European countries colonised by Rome.

This spice is the mainstay of traditional Indian home remedies to treat day to day ills like nausea, common cold, cough, colic, loss of appetite, and rheumatism. It was also applied as a paste to the temples to relieve headache. Practitioners of Chinese herbal medicine traditionally use ginger to expel cold and restore depleted yang.

The botanical name, Zingiber officinale, is said to be derived from its Sanskrit name-‘Singabera’ which means ‘shaped like a horn’.


Buying and storing

In India, fresh ginger is available in most vegetable markets. Select the dry root as against the moist soft root. The former will stay fresh longer.
If the skin is not too tough, the ginger can be washed thoroughly and chopped finely with the skin intact to suit your requirement. The skin can be peeled with a paring knife in case it is very tough.
Whole ginger root can be stored in an airtight container in the refrigerator for a few weeks. However the more tender moist variety doesn't last as long as the slightly tougher drier kinds.

You can grow ginger in your backyard!

Buy fleshy gingers with many buds. Soak them in warm water overnight, and then set them just under the soil surface with the buds facing up. Water lightly at first, then more heavily when growth starts. Expect plants to reach maturity, and a height of 2 to 4 feet, in 10 months to a year. Dig up new, young sprouts that appear in front of the main plants (they form their own tubers), use what you need, and freeze or replant the rest.

Good for you
~Morning sickness experienced in the 1st trimester of pregnancy can be safely relieved by eating fresh ginger root. This natural remedy has no significant side effects or harmful effects on pregnancy.
~Ginger contains a very potent anti-inflammatory substances that have a positive effect on rheumatic and arthritic pains. It has been clinically proven that in patients with painful, swollen knees- ginger reduced both the pain and swelling.
~Gingerol is also seen to selectively destroy the ovarian cancer cells due to its anti-inflammatory effect. Ovarian cancer is often detected very late due to absence of symptoms till the later stages. Regular consumption of ginger could well be the mode of prevention for this hidden cancer.
~Reaching out for a cup of spicy ginger-tea during the rains and cold wintry evenings is nature’s own way of strengthening our immunity.

Ginger is highly concentrated with active substances, so you need very little quantities to benefit from it. Ginger tea made by steeping two 1/2-inch slices of pounded fresh ginger in a cup of hot water, relieves nausea. In arthritic conditions, some people have found relief consuming as little as a 1/4-inch slice of fresh ginger in food, although studies show that patients who consumed more ginger reported quicker and better relief.

Ginger in Ayurveda


~Ayurveda recommends eating a couple of thin slices of ginger before a meal to ensure proper digestion and absorption of nutrients.
~Traditional Ayurvedic texts recommend ginger for joint pains, morning sickness, motion or airsickness
~It is also believed to facilitate better absorption of nutrients and better elimination of wastes.

Cooking with ginger

Indian Ginger tea

This tea is spicy and warming. A cup of this tea can also be had after lunch to facilitate digestion. It is also soothing in colds. This recipe makes 2 cups of tea.

Ingredients
1 ½ cups water
¾ cup milk (whole or skimmed)
½ inch fresh ginger root
2 tsp tea leaves (CTC or any strong tea)
Sugar to taste


Method
Wash the ginger thoroughly and pound it in a mortar-pestle. It can also be grated coarsely.
Place the water and milk in a pan to boil. Add the ginger and tea leaves with the required sugar and bring to a boil. Once it comes to a boil, reduce the heat to a simmer and let the tea simmer for 3-4 minutes so that the essence of ginger gets into the tea.
Strain into tea cups and drink immediately.

Notes
You could also add crushed pepper corns, pounded whole cinnamon, crushed cardamom pods and grated nutmeg to the boiling water to make the traditional Indian 'Masala chai'.

More ideas
1.Add freshly grated ginger with toasted sesame seeds in salad dressings.
2.A Tbsp of finely chopped ginger, sautéed with green chillies and green peas can be mixed with leftover rice to make ginger fried rice.
3.Make herbal tea using ginger slices and tulsi (Holy Basil) or mint leaves steeped in hot water.


If you like what we girls do here and would like to vote for us in the Blogger's Choice Awards here. Thanks for your support!


Are you interested in contributing to The Daily Tiffin? Drop us an email: blogmeeta@gmail.com. We look forward to hearing your ideas.

This Post was written by Nandita from Saffron Trail.

Tiffin Tuesday - Recovery lunch

Tuesday, May 15, 2007

Posted by jokergirl@wererabbits

Hello again!

I'm back from travelling across Europe just in time for another Bento at Tiffin Tuesday. Although it almost would not have been - I was not so sure that I would ever want to eat anything again after a nasty food poisoning in Italy last week!
Therefore, and as my contribution to the Safety & Care event on The Daily Tiffin this month, my bento is a get well soon bento - food poisoning aftercare and info included!


A light meal of rice, breaded yellow zucchini and breadcrumb patties with avocado paste to help my stomach recover and regain stability.
Since I usually avoid deep-fried food to begin with, and twice so with a sensitive stomach, the breading on those zucchini is oven baked! The recipe for this is really simple and works for many other vegetables as well, i.e. eggplant.
Cut the vegetables into about 1cm thick slices, salt on both sides and let them draw water on kitchen paper for 15-30 minutes. Then dry them, brush off excess salt and roll lightly in flour, then whisked egg with a dash of milk and finally the breadcrumbs, just like breading meat. Lay them out on a non-stick oven pan lightly brushed with olive oil and bake in a pre-heated oven until they are cooked and the breading is light brown all over. If they have drawn enough, the vegetables will not shed water anymore and breading will get crisp and nice on both sides!

As dessert there are mango pieces, frozen to act as ice pack thanks to Biggie's suggestion!

I must stress that it was not my bentos that made me sick! In fact, I read Biggie's wonderful article a while ago and took it to heart. Rather, it was my inability to make bento while working abroad and having to rely on cantina food that got me.
So since you can't ever be completely safe - what to do if food poisoning does strike?

Most so-called food poisonings are not caused by the food itself, but by contaminations introduced by bad hygiene. Wrong temperatures, dirty environments and sick handlers are the main cause of such infections. The poisonous substances are created by bacteria, virii or other microbes introduced in that way. Much rarer are cases of toxins in the food itself, i.e. bad mushrooms or cleaning agents.
Luckily for us (though anyone stricken may not think so at the moment), our body has a good system for getting rid of the poison: to get rid of the contents of stomach and bowels as quickly as possible. The symptoms are well known - nausea, vomiting, and diarrhea that comes on suddenly. Not comfortable, but effective! In most cases, that will be enough to purge the body and allow a fast recovery within the next days. Most cases of food poisoning don't require any medication.

So if you (or somebody in your care) is the unlucky one,
  • Don't Panic! It's embarrassing, uncomfortable and annoying, but most cases are over in 24-48 hours. Comfort yourself with the knowledge that it will be over soon. If you feel there is an emergency or that something else may be wrong, go to a doctor - read about signs of emergency below.
  • Drink lots of water, ideally still mineral water or very diluted syrup/electrolytic sports drinks as that contains some of the electrolytes you also lose. Dehydration is one of the big dangers of food poisoning, especially to children! Even if you think you can't keep it down, it will help flush out your stomach.
  • Don't eat or drink any caffeinated, sugary or sour substances. Those irritate your bowels and impair the stomach's self-healing abilities.
  • Stay at home if you can, and give your body time to recover. Try to lie down. Get someone to check up on you periodically or in case you need to go to a doctor.
  • Start eating again slowly after the nausea has stopped. Continue to drink lots of fluid.
    Don't force yourself to eat if you are still feeling nauseous. It won't help.
    Also, don't attempt to go back to your normal eating habits too quickly - eat as much as your stomach tells you it can tolerate, not as much as you think you should eat.
    Start with bland and safe foods (biscuits, day-old bread, water) to reboot your stomach. Safe vegetables are e.g. cooked squash and root vegetables. Avoid spicy/fat/sour food, food that is a contamination risk to begin with (chicken soup anyone?) or anything that may cause allergies. Avoid sugar, coffee and carbonated drinks for a while.
  • Go to a doctor if you think there is an emergency.


Signs of emergency
GO SEE A DOCTOR IMMEDIATELY if:

  • You find blood or a coffee-ground like substance in the vomit.
  • Vomiting/Diarrhea that goes on for longer than 48 hours, or more than half a day in a kid. Kids under 3 years should always be checked out by a doctor!
  • Fever, vision or motoric problems or loss of conscience.
  • Strong pain that does not go away.
  • More than one person has the same symptoms ("outbreak")
  • Risk of dehydration (you can't keep any liquid down)
  • Jaundice (Skin or eyes turn yellow)
  • You need a medicine but can't keep it down.


I hope you will never get in the situation at all, but if you do, this article may help or at least comfort you. And if so, get well soon!

Sources and additional information:
1) eMedicineHealth article on Food Poisoning: http://www.emedicinehealth.com/food_poisoning/article_em.htm
2) Wikipedia: http://en.wikipedia.org/wiki/Food_poisoning


If you like what we girls do here and would like to vote for us in the Blogger's Choice Awards here. Thanks for your support!


Are you interested in contributing to The Daily Tiffin? Drop us an email: blogmeeta@gmail.com. We look forward to hearing your ideas.

This Post was written by jokergirl from Wererabbits.


A Few Reminders

Monday, May 14, 2007

Posted by Meeta K. Wolff

We hope you all had a great weekend! For all the mommies here, hope you had a wonderful day yesterday.

We just wanted to take this opportunity to remind you about our event this month - Kids in the Kitchen. We look forward to all your ideas and we've already received a couple of entries. You still have till May 19th to send in your own thoughts, ideas and guidelines. All this month we, at the Daily Tiffin, are also concentrating on Safety and Care. You'll find interesting articles for food safety for packed lunches and preventing accidents in the kitchen. There's more to come so we hope you will join us throughout May as we discuss Safety and Care at home.

While we are on the subject of reminders we would also like to ask you to spare a few minutes and vote for us as your favorite Parenting Blog. Each one of us puts in a lot of energy and research into the posts and we'd really appreciate your support.

Some of our own individual blogs have also been nominated and we'd love your support there too - if you think we deserve it of course:
Best Health Blog - FitSugar
Best Health Blog - Saffron Trail
Best Food Blog - Lunch in a Box
Best Food Blog - What's For Lunch Honey?
Best Photography Blog - What's For Lunch Honey?


If you like what we girls do here and would like to vote for us in the Blogger's Choice Awards here. Thanks for your support!


Are you interested in contributing to The Daily Tiffin? Drop us an email: blogmeeta@gmail.com. We look forward to hearing your ideas.

Happy Mother's Day!

Sunday, May 13, 2007

Posted by Meeta K. Wolff


We all at the Daily Tiffin would like to wish mummies around the world a very Happy Mother's Day! Put your feet up and enjoy the day. This is in honor of all your hard work, love and affection!


If you like what we girls do here and would like to vote for us in the Blogger's Choice Awards here. Thanks for your support!


Are you interested in contributing to The Daily Tiffin? Drop us an email: blogmeeta@gmail.com. We look forward to hearing your ideas.


Safety in the Kitchen – Part 1: Preventing Accidents

Thursday, May 10, 2007

Posted by gilly


The kitchen may well be the most used room in the home. We prepare food there, eat there, even entertain there. Given the amount of time spent there, along with the nature of activities that go on in it, the potential for kitchen accidents is quite high. In this first of a two part series on Safety in the Kitchen, we look at preventative measures that can be taken to reduce the likelihood of accidents occurring in our kitchens.


Although it’s impossible to foresee every type of accident that might occur in the kitchen, there are certain accidents that we see over and over again. Often, these could have been prevented by taking appropriate safety measures. The following are some ideas to minimize the risk of injury to yourself or your loved ones. Although most of them are common sense, it never hurts to go over and understand them.

Preventing slips and falls


  • Clean messes and spills immediately to prevent slipping and falling.
  • Do not stand on unsteady objects to reach overhead items.
  • Keep the floor clear of objects that may pose tripping hazards, such as boxes, groceries, pets, even small children!


Preventing cuts and scrapes

  • Use knives on a proper cutting surface. While they aren’t in use, place knives on a flat, solid surface – away from the edge of counters, tables, etc.
  • Never leave knives in dishwater – it may cut the unsuspecting dishwasher. Wash and dry knives separately.
  • Clean up broken glass slowly and thoroughly. Dispose of glasses, plates, etc. that are chipped or cracked before they shatter or break in usage.
  • Keep all sharp objects out of the reach of children.


Preventing poisoning (chemical, food…)

  • Wash hands before you begin working in the kitchen, as well as regularly as you work.
  • Lock cleaners and chemicals away from children – either by putting child proof mechanisms on kitchen cabinets or keeping them in another secured area.
  • If chemical cleaners or other dangerous items must be kept in the kitchen, store them at the lowest points so that any leaks will not contaminate food.
  • Wash fresh food and produce prior to preparation.
  • Follow directions when preparing meats, poultry, eggs and seafood. Internal temperatures safe for consumption are as follows:

    • beef, lamb and veal ~145F (63C)
    • pork and ground beef ~160F (71C)
    • whole poultry and thighs ~180F (82C)
    • poultry breasts ~170F (77C)
    • ground chicken or ground turkey ~165F (74C).
    • eggs ~160F (71C)
    • seafood ~145F (63C)

  • Do not thaw frozen meats, poultry etc. in the kitchen sink or on the kitchen counter. Microwave to defrost, if possible.
  • Always wash contaminated surfaces immediately.
  • Wash can lids prior to opening, and avoid cans that have dents or other surface compromises.
  • Keep your refrigerator set ~40F (4C).
  • Foods should either be hot or cold – lukewarm foods encourage bacterial growth, leading to food poisoning, or quicker spoilage.


Preventing Fires and Burns

  • Keep a fire-extinguisher in your kitchen. Be sure to read and understand how to use it properly – i.e. spraying the SOURCE of the flames, not just the flames themselves.
  • Keep flammable items away from burners – this includes things such as curtains, oven mitts, napkins, paper towels, etc.
  • Keep pot handles turned away from the edge of the stove (not over adjacent burners), and keep hot dishes away from the edges of counters, stoves, tables, etc. where they may be pulled down or knocked over.
  • Keep flammable materials, and materials with vapours away from the stove and range, as they may spontaneously ignite.
  • Do not give young children pots and pans to play with – they may grab these ‘toys’ when they are filled with hot items.
  • Use the appropriate oven mitts or pot holders to handle hot dishes. Be wary of opening lids of very hot or boiling food items as steam can cause serious burns.
  • Know what to do in case of a grease fire:

    • Cover the pot or pan with a large and heavy lid, or larger pan. Turn off heat – or keep the oven door closed. All of these tactics can help ‘smother’ the flame.
    • NEVER try to put it out with water!
    • Use a fire extinguisher, fire blanket, or even baking soda as a means to put out the fire.

  • Make sure all burners and the stove are turned off when not in use.


Preventing general injuries

  • Read and understand how to operate your appliances. Keep their cords neatly away from the edges of counters, tables, etc. to prevent them from being pull over the edge.
  • Keep a well stocked first aid kit in the kitchen, and be sure that everyone knows its location.
  • Keep emergency numbers (fire, police, poison control) near the telephone and be sure everyone is aware of them.
  • Keep long hair tied back, and do not wear dangly jewelry or loose clothes while you are working.
  • Pay attention to what you are doing, whether it is cutting up food, cooking on the stove, using a mixer, etc. Never leave these items unattended.


Although this is not an exhaustive list, I hope that this will help you reconsider safety in the kitchen. Do you have safety tips you follow to keep yourself and others safe? We’d love to hear about it in the comments section!

Until next time, I wish you health, happiness, and SAFETY!

Additional Resources:
Kitchen Safety - http://www.cdc.gov/nasd/docs/d000801-d000900/d000825/d000825.html
General Safety Around the Kitchen -http://www.premiersystems.com/recipes/kitchen-safety/cooking-safety.html
KITCHEN SAFETY - http://www.ci.phoenix.az.us/FIRE/kitchen.html
Food Safety Test - http://www.fda.gov/fdac/features/895_kitchen.html
Kitchen Safety Checklist - http://www.homesafetycouncil.org/safety_guide/sg_kitchen_p001.pdf


If you like what we girls do here and would like to vote for us in the Blogger's Choice Awards here. Thanks for your support!


Are you interested in contributing to The Daily Tiffin? Drop us an email: blogmeeta@gmail.com. We look forward to hearing your ideas.

This Post was written by Gilly from Humble Pie


Mother's Day - A special day for mommies!

Wednesday, May 09, 2007

Posted by Meeta K. Wolff


The family
is like a garden
with joy
for all to share,
With tender, growing blossoms
that thrive on love
and care,
And when
the flowers are gathered
for a very special day,
They make
a bright and beautiful
happiness bouquet.


by Mary Loberg

This is one of my favorite poems describing a family and what it means to have a family. I got it on a beautiful card last year from my son!

I'll be celebrating Mother's Day for a the fifth time this Sunday!


However, it is particularly this year that I am really taking this actively in. Why? Well probably this year my son is also old enough to understand what each individual parent can offer him. As a mommy my love, affection and provisions for my son are different as those to what his daddy gives him. Sure we both are very eager about his well being and welfare and always have his best interests in minds. But each parent provides differently for their child.

This year I too am also understanding what it meant for my mum to raise me. I may not have been the easiest of kids to raise but I think she did a wonderful job. I am seeing myself mirror in Soeren in so many situations, that makes me open my eyes as to the efforts my own mother put in raising me.

All this made me curious as to where Mother's Day tradition actually originated from. So, began my little research. I wanted to share this with you as I know there are many mommies out there reading this today. Instead of gift ideas and card ideas, I thought it would be nice to go back to the roots and see where this tradition came from.

There really is a history to Mother's Day and it is not something invented in the meeting rooms of card manufacturer's!

Tributes to mothers can be traced back to ancient Greek times when their annual spring festival dedicated to the mother of many deities, Rhea, was celebrated. The ancient Romans made offerings to their Great Mother of Gods, Cybele. In the 1600's, England celebrated a day called "Mothering Sunday", which is celebrated on the 4th Sunday of Lent and honored the mothers of England. Mother's Day in England today is still celebrated on this day.

In the United States, Mother's Day actually started approximately 150 years ago, when Anna Jarvis, an Appalachian homemaker, organized a day to raise awareness of poor health conditions in her community. She believed this cause would be best advocated by mothers and called it "Mother's Work Day."

When Anna Jarvis died in 1905, her daughter, Anna Marie Jarvis, began a campaign to memorialize the life work of her mother. Anna is said to have remembered a Sunday school lesson that her mother gave in which she said,
"I hope and pray that someone, sometime, will found a memorial mother's day. There are many days for men, but none for mothers."

Anna lobbied her cause to prominent businessmen and politicians including Presidents Taft and Roosevelt to support her campaign to create a special day to honor mothers. In 1908, one of the first services was organized to celebrate Anna's mother in her church in West Virginia. Anna handed out her mother's favorite flowers to the attending guests - white carnations. In 1914 Anna's hard work paid off when Woodrow Wilson signed a bill recognizing Mother's Day as a national holiday.

Initially, people celebrated Mother's Day by attending church, writing letters to their mothers, and eventually, by sending cards, presents, and flowers. With the increasing gift-giving activity associated with Mother's Day, Anna Jarvis became enraged. It was her belief that the day's sentiment was being sacrificed at the expense of greed and profit. She even filed a lawsuit to a Mother's Day festival. Before her death in 1948, Jarvis is said to have confessed that she regretted ever starting the mother's day tradition.

Today, Mother's Day has flourished all over the world. In fact, many countries have their own specific day where Mother's Day is celebrated. Sons and daughters take advantage of this day to honor and to express appreciation of their mothers

How are you celebrating Mother's Day? Do you have special Mother's day traditions? Share these with us in our comments section. On Sunday we'll list the top 10 traditions in a separate post.

And for any daddies who might happen to read this post and have younger children: Mother's Day is on May 13th - that's this Sunday!!

Resources for this post:
Mother's Day - The Story
Mother's Day on Wikipedia


If you like what we girls do here and would like to vote for us in the Blogger's Choice Awards here. Thanks for your support!


Are you interested in contributing to The Daily Tiffin? Drop us an email: blogmeeta@gmail.com. We look forward to hearing your ideas.

This Post was written by Meeta from What's For Lunch, Honey?

Food safety for packed lunches

Tuesday, May 08, 2007

Posted by Biggie

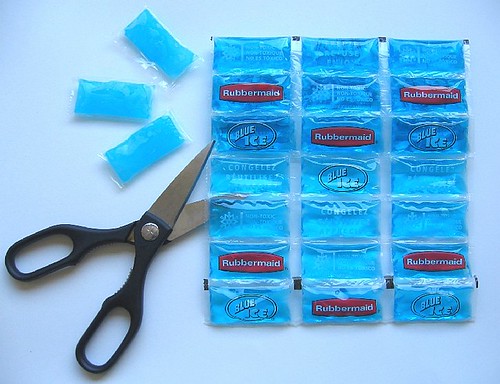
Reusable ice blanket for packed lunches


May is Safety and Care month on The Daily Tiffin, so I wanted to share some pointers on keeping our packed lunches safe from spoiling. In my reading, the most interesting thing I found was modern research on foods with naturally antibacterial properties, which starts to explain traditional wisdom about food spoilage around the world. There are four main methods to keep your packed lunch safe:
  1. Incorporate food and products with antibacterial properties
  2. Keep it clean: Don't introduce bacteria into the lunch when packing
  3. Keep hot foods hot and cold foods cold, using thermal jars and cold packs
  4. Pack less perishable foods, especially in the summer
    • Extra precautions for hot weather
    • Handy foods for hot weather
    • Ways to make dishes less perishable
The following are only guidelines for food safety; please make your own decisions about what you're comfortable packing and eating (I am not a food safety authority).


  1. Incorporate food and products with antibacterial properties


    Foods

    Japanese bento cookbooks traditionally suggest packing foods with antibacterial properties in lunches in order to keep food from spoiling. Suggested foods include umeboshi (pickled plum), wasabi, ginger, karashi, salt, shiso, parsley and vinegar (i.e. making sushi rice, or putting an umeboshi or a tablespoon or two of rice vinegar in the cooking water when making rice). Some recommend wiping the inside of the bento box with a slice of ginger before packing. This is all fine and good for Japanese food, but that's not what I usually eat for lunch.

    New USDA- and NSF-funded research on foods with antibacterial properties has yielded a number of foods that fit nicely in the world food lunchbox. The strongest antibacterial foods (killing all bacteria) are evidently garlic, onion, allspice and oregano. The second strongest (killing up to 80% of bacteria) include thyme, cinnamon, tarragon, cumin (and lemongrass). The third strongest (killing up to 75% of bacteria) are capsicums, including chilies and hot peppers. The fourth strongest (killing 25% of bacteria) include white and black pepper, ginger, anise seed, celery seed, and lemon or lime juice. Honey has antibacterial properties, and the dodecenal compound in cilantro/coriander (both fresh leaves and seeds) is evidently one of the stronger antibacterials as well. (see sources 1 - 3 below)


  2. Products


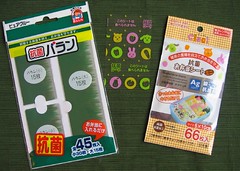
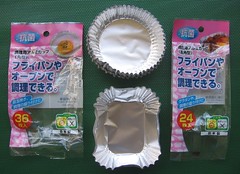
    There are a number of bento products in Japan that have been treated with an antibacterial coating (i.e. flavorless compounds extracted from wasabi, etc.), designed to stave off microbial growth in packed lunches. These include aluminum food cups for cooking, plastic sheets that you place on the surface of your packed food, and food dividers that look like sushi grass. These must be touching the surface of the food to be effective. Not all food dividers and food cups are antibacterial; they must be marked "antibacterial". I bought the products below at local dollar stores and markets in San Francisco; click the photos for larger views with the "antibacterial" character indicated.

    Antibacterial food dividers and bento sheets:

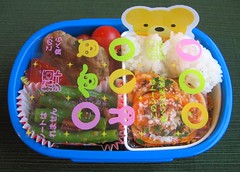
    Antibacterial lunch dividers and bento sheets Antibacterial bento sheet in action

    Antibacterial cups:

    Antibacterial food cups


  3. Keep it Clean: Don't introduce bacteria into the lunch when packing
    Make sure your hands, food prep area, utensils and lunch containers are clean. When possible, use utensils (chopsticks, spoon, tongs, plastic wrap) to place, mold and arrange unwrapped food in your lunch container. If you're using a bento box with a rubber packing strip around the lid, be sure to periodically remove, wash and thoroughly dry the packing seal (and the groove in the lid). This will keep your box clean and ensure that the packing strip does not crack, which would leave you without a watertight seal.

  4. Avoid the temperature danger zone with perishable foods
    • The danger zone for bacteria growth is between 40 to 140F (4 to 60C, or room temperature). An extremely effective way to keep food safe until you eat it is to minimize the time food spends in this temperature zone (ideally less than three hours). The USDA's food safety page has a number of useful guidelines.

    • Keep hot foods hot by using a pre-heated insulated thermos or food jar for liquids like curries, soups, stews, etc. To pre-heat, fill the thermos with hot water, let it stand for a minute or two, empty the thermos, and fill with hot food (close it quickly!). You can get little kid-sized 300ml food jars at superstores like Target or Walmart, bigger food jars, or even large thermal lunch jars with multiple containers inside (like the Mr. Bento or Ms. Bento) from online stores Amazon.com.

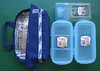
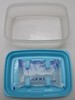
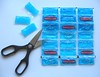
    • Keep cold perishable foods cold by storing your lunch in a refrigerator (if available) or using insulated lunch bags or containers with cold gel packs. Western versions include insulated lunchboxes, the Laptop Lunchbox, Fit N Fresh containers; Japanese versions include insulated bento bags and picnic sets, bento boxes with a gel pack integrated into the lid, and insulated bento kits (with a thermal jar for the lid, two lidded side containers and an insulated carrying bag that you can put a gel pack into to carry hot and cold items at the same time). Thermal lunch jars can also be pre-chilled with ice water and used to pack chilled lunches. Flexible ice blankets are essentially a quilt of small reusable ice packs. They can be cut apart to produce many small ice packs, perfect for throwing into an insulated lunch bag (ice blankets are widely available at sporting stores, wholesale food stores and drugstores). Click on the photos below for a larger view.
      Insulated Urara lunch bag Lock & Lock insulated bento setChilled bento box with built-in gel pack Insulated bento setReusable ice blanket for packed lunches


  5. Pack less perishable foods, especially in the summer. Rice becomes hard and unappetizing when refrigerated at low temperatures, so many Japanese forego refrigeration and cold packs for their rice-based bentos, choosing instead to incorporate antibacterial foods, pack foods that are less likely to spoil, and make their food less perishable through traditional cooking/packing methods.


  • Extra precautions for hot weather (for lunches to be eaten at room temperature)

    • Japanese bento cookbooks instruct you to make sure all food in a packed lunch has been thoroughly heated through to the middle, so in hot weather scramble eggs until they are dry. Avoid raw or rare meat, poultry, fish or eggs. Avoid raw fillings for rice balls (make sure tarako fish eggs are grilled). Heat (then cool) even processed meats like sausages or hot dogs before packing to kill any bacteria that may have been introduced after processing.
    • Avoid dairy products such as yogurt (especially when spooned out of a larger container).
    • Avoid moist, liquidy foods.
    • Avoid packing regular tofu in the same container as other foods as it sheds water and spoils easily.
    • Avoid raw vegetables except cherry tomatoes.
    • Avoid cut fruit as it spoils easily; pack whole fruit like a banana instead.
    • Exercise caution with cooked rice, potatoes, grains and legumes (spice heavily, mix with antibacterial foods, dry thoroughly).

  • Handy foods that survive summer heat
    • Cherry tomatoes
    • Rice that has been mixed with pickled vegetables, chopped pickled plum (umeboshi), or other foods with antibacterial properties
    • Whole fruit
    • Canned fruit that has been frozen in single-serving freezer containers (pack frozen to act as a cool pack)
    • One-bite jellies that have been frozen (pack frozen to act as a cool pack)
    • Juice boxes or bottled water that have been frozen (pack frozen to act as a cool pack)

  • How to make dishes less perishable
    • With moist, liquidy foods, first dry before packing (drain in a small colander or on paper towels) and pack in a paper food cup to contain any excess moisture.
    • Spice foods more heavily than usual.
    • If you're cooking or heating foods right before packing them in a sealed container (such as a bento box) to be eaten at room temperature, be sure to cool them first before packing. Once you've packed the lunch, allow it to cool further with its lid off to avoid condensation on the inside of the container. This also makes the box easier to open at lunchtime (an important point for preschoolers!)

Sources:
1) 1998 Cornell study on antibacterial spices: http://www.news.cornell.edu/Chronicle/98/3.5.98/spices.html
2) Cilantro article: http://www.eurekalert.org/pub_releases/2004-05/acs-is052404.php
3) CookWise, Shirley O. Corriher, 1997.
4) The New Professional Chef, Culinary Institute of America
5) USDA lunch food safety guidelines: http://www.cfsan.fda.gov/~dms/ftteats.html#lunch
6) USDA Freezing/Refrigerating time chart: http://www.cfsan.fda.gov/~dms/fttstore.html
7) Aijo Tappuri! Obento, Shufu no Tomo, 2007.
8) Obento Daijiten, Index Magazine, 2005.


If you like what we do here and would like support us in the Blogger's Choice Awards, vote here. Thanks for your support!


Are you interested in contributing to The Daily Tiffin? Drop us an email: blogmeeta@gmail.com. We look forward to hearing your ideas.

This Post was written by Biggie from Lunch in a Box.

Recipe: Welsh Cakes

Thursday, May 03, 2007

Posted by Meeta K. Wolff


Our regular contributor Stephanie sends in her recipe for Welsh cakes. They are somewhat like scones and are perfect for many occasions. Stephanie packs them in her kids' lunch boxes as a treat.


Ingredients:
1 cup butter
3/4 cup sugar
2 1/2 cups flour
1 teaspoon salt
3 teaspoons baking powder
1 egg
1/2 cup milk
1 cup currants, washed and drained

Method:
Mix together dry ingredients.
Cut in cold butter. You can use a food processor and pulse for a few seconds until it resembles a course meal.
Mix egg and milk together and slowly add to dry ingredients.
Stir in currents. If they looked a bit dried out, you can plump them first by placing currents in a microwave safe dish, add ½ cup of water and heat in microwave for 1-2 minutes. Drain and cool before mixing.
Turn onto a floured board and roll 1/4 inch thick.
Cut into rounds and fry on an electric skillet at 300 degrees Fahrenheit (or medium heat on a gas griddle) for about 5 minutes on each side. I do spray my griddle lightly with non-stick baking spray.

More bread ideas:
<30 minutes Breads
Welsh Breads
Grain Breads
Historical Traditional Breads


If you like what we girls do here and would like to vote for us in the Blogger's Choice Awards here. Thanks for your support!


Are you interested in contributing to The Daily Tiffin? Drop us an email: blogmeeta@gmail.com. We look forward to hearing your ideas.

This Post was contributed by Stephanie from Mix it up Meals

Tiffin Tuesday: Spring in the lunch box

Tuesday, May 01, 2007

Posted by Meeta K. Wolff


I can't help it! I am so enjoying the fact that spring is here that I have to sneak a bit of it everywhere. My photos, my food, even the lunch boxes are not spared. This time of the year is so fantastic and I think I have been spending too many hours at our Farmer's Market lately just gazing at all the colorful food and flowers they sell.


The most enjoyable part of this season is all the fun things we can do with Soeren. It's been a few weeks of a wonderful learning process for Soeren in many aspects. An example is the mastering of riding the bike without the side wheels.

He finally braved up enough courage to get Daddy to take the side wheels off and after a few rough starts he had it down within a few tries. It was a true feeling of pride I felt as I saw my son with his huge crash helmet on that bike pedaling off into the horizon! The coolest thing was his own pride:

"Mummy, it's working! I can do it without the wheels!"

Now, my favorite pass time with my son is getting our bikes out and going for a short tour around the park. This is such a fantastic experience for me too. I am sure many mums will understand this: I often do not have the "quality" time Daddy has. Even when playing with Soeren at home, I need to mulit-task to get the chores, dinner etc. all done. Going for a bike trip with a little picnic in our backpacks is a very special time - just for mummy and son. And I am cherishing every little moment this Spring.

The lunch box idea today also reflects not only the season but my mood. Colorful and fun.
Prep Time: 7-10 minutes
I had made the spinach and fennel loaf on the previous evening and all I needed to do this morning was cut up two relatively thick slices. I added some herb flavored quark as a refreshing spread. You can also substitute any flavored cream cheese for this too.
A few organic grapes, raspberries and strawberries make a colorful fruity mix. The banana was a leftover from his breakfast muesli as he only wanted to have a half cut up in it. As a treat a cream filled chinois with chocolate chips.

The spinach and fennel loaf is a fantastic light dinner time meal. You will find the recipe here.

Hope you too have the chance to spend some wonderful moments with your family. Enjoy the week.


If you like what we girls do here and would like to vote for us in the Blogger's Choice Awards here. Thanks for your support!


Are you interested in contributing to The Daily Tiffin? Drop us an email: blogmeeta@gmail.com. We look forward to hearing your ideas.

This Post was written by Meeta from What's For Lunch, Honey?