Showing posts with label Vegetables. Show all posts

Roasted Potatoes and my trip to Aleppo

Monday, November 09, 2009

Posted by Antonio Tahhan

note: I want to apologize to everyone for being late with this post. I am going out of town in a few days and have been running around like a crazy person trying to get everything in order before my trip.


A couple weeks ago, I finally bought my plane ticket to go to Aleppo. My grandmother is there now, visiting her sister, and I will get to join them in just a few days. Middle Eastern food, like most of the food from around the Mediterranean, is extremely fresh and healthy. I promise to be back with lots of pictures and recipes that I will share on the Daily Tiffin.

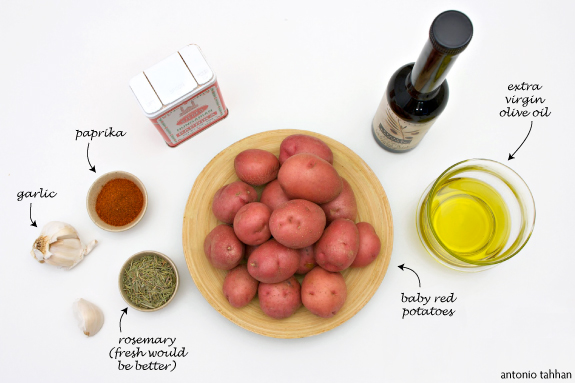
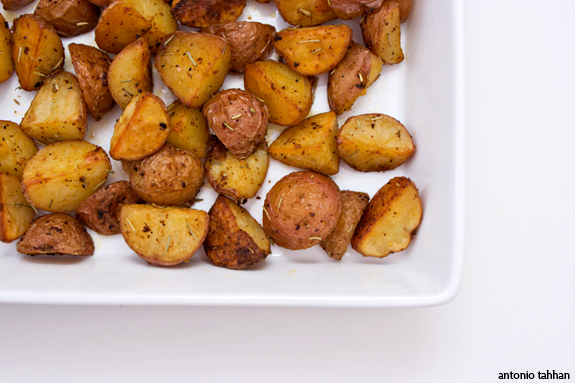
In the mean time, I've been strategically trying to use up all my produce and perishables for the past couple of weeks. Today I chose to write about roasted potatoes because they're a healthy alternative to fried potatoes, but are still popular with the kids. They're great in lunch boxes or afternoon snacks, and easy enough to make in large batches. There are a few steps, however, to ensuring a perfect roast with an extra crispy exterior and ultra creamy inside.


Preparation is simple. It makes a big difference to scout out good potatoes for this dish: small, firm and tight skin. I prefer reds simply because they have a higher sugar content, so they tend to caramelize better than other potatoes in the oven.


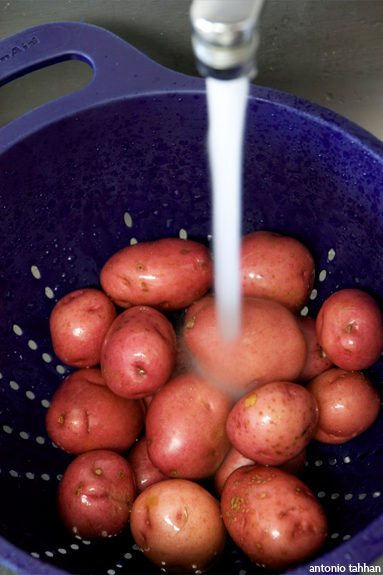
Since potatoes grow underground, you'll want to give them a quick rinse before you roast them. Make sure to pat them dry so that the outsides crisp up.


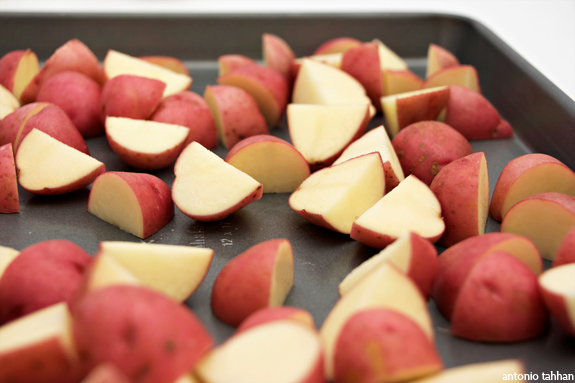
It's also important not to crowd the potatoes in a pan, otherwise they will still steam, regardless of how well you've patted them dry.


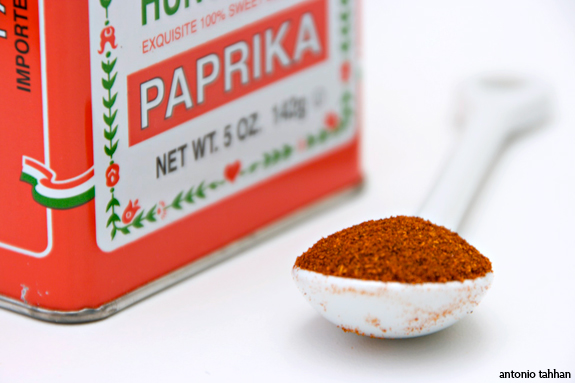
Although I usually use Spanish paprika, or pimentón, it's a lot easier to find the Hungarian variety at my local grocery store. My inspiration for using paprika in my roasted potatoes came from patatas bravas -- a classic tapas made from fried tomatoes covered in a spicy pimentón-base sauce. If you can't find Spanish paprika near where you live, Amazon is where I usually buy from.


Once they come out of the oven, they can be eaten hot or at room temperature. Enjoy!

Click here for the recipe.


This post was written by Antonio Tahhan


Are you interested in contributing to The Daily Tiffin? Drop us an email: thedailytiffin@gmail.com. We look forward to hearing your ideas.

FEEDING THE FINICKY

Thursday, October 08, 2009

Posted by Jamie

MEET MR. PERSNICKETY

Oh, happy the parent who has children who eat everything. Happy eaters are a joy to behold, watching as they merrily lick beaters and agree to taste test all cooking adventures. Pure pleasure is the child who digs the serving spoon into the bowl and piles it high on his/her plate, no matter that he/she has never eaten it before. Garlic, eggplant, carrots, mascarpone cream, preserved lemons or pumpkin desserts don’t lead to wrinkled brows, turned up noses and groans of disgust, but rather interest, excitement and licked lips.

The persnickety child's dream!

Clement was – and is – this kind of child. Maybe he was influenced by my diet when I was pregnant, a diet consisting of the savory and the spicy, couscous and tagines, stews and seafood creoles, the intense flavor seeping through my body to him, a baby growing into my adventurous tastebuds. Or maybe it is due to the fact that from the moment he could open his tiny mouth we would offer him tastes of everything soft and smooth, from fresh goat cheese to chocolate pudding, just a tad on the tip of our pinkie finger, enough to get a reaction. And the reaction was always one of pure pleasure. By the time he could sit in a high chair, he loved sucking on lemon slices or biting into cloves of garlic, he would suck down baby spoonfuls of everything that we cooked or baked for ourselves, a foodie in the making.

And he always loved everything, cheeses, from the mild to the strong, exotic food from any culture, vegetables one and all, desserts both child-oriented and adult.

And then came Simon. Ah, what do the experts say about this? This second pregnancy was punctuated by American fast food cravings and plates piled high with brownies. The tiny taste tests were mostly abandoned when he was a tot. And one day, out of the blue, he pressed his lovely pink lips together, crossed his baby arms and refused what was on the end of the fork. And life was never the same. Here was a child, adorable, sweet and mild-tempered, a child who simply said “no” to food, no to anything flavorful, anything out of the ordinary, his version of ordinary. Years followed, years of eating pasta in bianco or white rice, plain grilled fish drizzled with the smallest amount of olive oil, plain chocolate cake with a smattering of powdered sugar, simple, tiny cheese ravioli in brodo, chicken broth. Fruit he loved, almost all fruit, so mealtimes usually found Clem with a plateful of vegetables in front of him and Simon with a bowl of sliced strawberries and banana, grapes and cubes of apples or pears, anything to get the maximum mix of vitamins.

As he’s grown, Mr. Persnickety, as I call him, has continued to eat simply, from pasta with red sauce to plates of white rice or unadorned couscous grains, spurning the fragrant, delicious veal blanquette or the lamb tagine that are served as the main course alongside these simple grains. He is wary of meat, dissecting it so minutely that it would make a forensic scientist proud, slicing off even the tiniest hint of fat. Vegetables get the old heave ho and most of what I cook is insulted with a “Oh, not that! Disgusting!” Fried foods and pizza, peanut butter or grilled cheese sandwiches, hamburgers and fries all pass with a thumbs up and desserts are limited to brownies and chocolate chip cookies, the most simple of chocolate cake or coffee cake with streusel. Simon was never so simple.

Feeding your child can't always be a hold up!

So how do we, the parent of the picky eater, how do we get our little darlings to eat anything healthy, anything vegetable, anything new? It becomes a game, a test: how to we package eggplant or spinach, fish or pumpkin in such a way that will actually have them eating it? Do we cook and serve them a separate meal or do we let them go hungry if they turn up their nose at what we have placed on the table? Or do we try and imagine dishes that may please, dishes that blend the loved with the hated in such a way that the persnickety child will finally put a forkful in his/her mouth and taste and maybe, just maybe, give a gentle shrug of the shoulders and say “it’s not bad”? And clean their plate. And make the foodie parent happy for one more meal. This is an ongoing project for me and I hope to be able, over the course of time and through my posts, I hope to be able to share some of these tasty dishes, successful meals, and there are indeed a few, with you.

Have them eat better... and healthier than this!

Greek-Inspired Spinach and Feta Triangles are easy to put together, if just a tad bit time consuming because of the phyllo/filo dough, and something that even my spinach-hating son, my finicky eater, will eat with pleasure (although he would never admit to the pleasure). I have made this at one time or another in one large baking dish, the filling sandwiched in between layers of filo dough, but wrapped in individual triangles makes it more fun to eat. Crunchy, buttery and delicious, chock full of feta cheese, add pine nuts or even chopped walnuts if you dare, this is a treat that everyone loves. It can be made in advance and stored in the fridge covered well with plastic wrap, just baking before serving.


GREEK-STYLE SPINACH-FETA TRIANGLES

1 1/2 lbs (800 g) fresh spinach, well-cleaned and coarsely chopped
1 1/2 cups (235 g - one package) feta cheese, drained and crumbled
1/2 cup (60 g) grated parmesan cheese, fresh when possible
3 large eggs, lightly beaten (if you make this in pie form, use 4 eggs)
2 Tbs chopped fresh mint
1/2 tsp ground nutmeg
freshly ground pepper and a dash of salt to taste
1/2 lb (250 g, about 20 sheets) filo dough, thawed if frozen - if you make these 6 large triangles, you will need 12 sheets
Melted butter for the filo


Wash the spinach leaves, shake off excess water and put into a large pot with a tight-fitting lid. Steam the spinach until wilted, then pour into a colander to drain. Allow to cool until easy to handle. Press out all the excess water you can with your hands, then gather up the cooked spinach and place in the center of a clean but old cloth dishtowel. Wrap or roll up the spinach in the towel and squeeze for all you are worth, squeezing out as much water as possible. Place the spinach on a cutting board and chop.

Put the chopped spinach in a mixing bowl, add the crumbled feta and parmesan cheeses, the chopped mint, nutmeg and salt and a good grinding of pepper (when adding salt, do so sparingly; remember that the feta is salty). Blend well. Now beat the eggs until well blended and stir them into the spinach-cheese mixture.


Preheat the oven to 375°F (190°C).

Now - the filo triangles. As you use each sheet of filo, keep the rest of the sheets covered with a just-damp towel so they don't dry out.

Melt the butter and allow to cool a bit.

Lay out the first sheet of filo with the wider length side to side, left to right. Brush the sheet quickly with butter. Lay a second sheet on top of the first and brush with butter. Repeat with a third sheet. With a very sharp knife, carefully slice from top to bottom into three equal strips. This will make the first three triangles.

Divide the spinach mixture into 6 (like I did here) or more parts depending on whether you want to make more or less triangles.* Scoop up one quantity and place it on the edge of the first strip of filo closest to you. Now, to form a triangle, lift up the bottom edge and bring the right bottom corner up towards the left edge (side), lining up the bottom and side edges to form a triangle. Holding this in place, use your free fingers to push the spinach mixture so it fills the triangle shape. Lift this up and fold upwards and continue folding until you have only about an inch of filo dough at the top. Brush this with butter to moisten, fold it over and seal your triangle "package". Place the triangle on a parchment-lined or buttered baking sheet, sealed side down.


Continue until you have made three triangles with the first three sheets of buttered filo. Repeat the process with three more buttered sheets and the rest of the spinach mixture. You now have 6 large triangles on your baking sheet. The triangles can be made ahead up to this point. Cover them well with plastic wrap and put into the fridge until ready to bake.

Brush the surface of each of the triangles with more melted butter. Bake for 15 minutes until golden.


* You can make this as one large pie, layering 8 - 10 of the buttered filo sheets in a buttered baking dish (the size of the dish depends on how thick you like the filling to be), spreading the spinach mixture evenly, then layering and buttering 8 - 10 more filo sheets on top. Bake until golden. Or you can make many more smaller triangles by cutting the filo dough either width- or length-wise into narrower strips.

Serve large triangles for lunch or dinner with a salad or smaller triangles as finger food.


This post was written by JAMIE


Are you interested in contributing to The Daily Tiffin? Drop us an email: thedailytiffin@gmail.com. We look forward to hearing your ideas.
Middle Eastern house salad

Tuesday, July 28, 2009

Posted by Antonio Tahhan

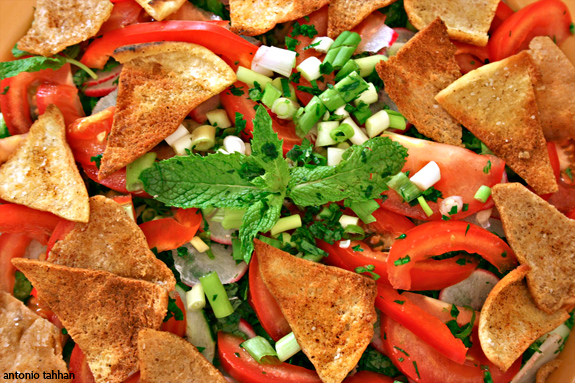
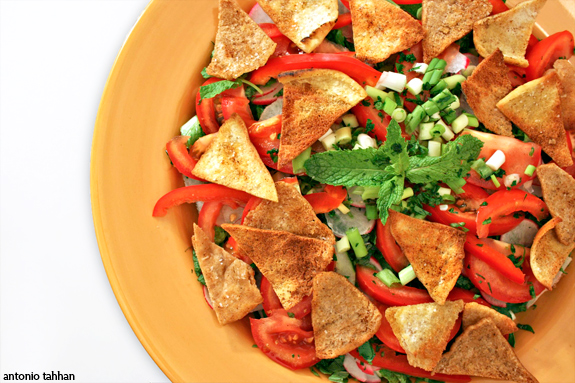
Sorry this is a day late. I was in Seattle for most of last week for the Web Design World conference and then spent time with my parents who came to visit me for the weekend. Seattle was beautiful and I cannot wait to show you pictures, but first, there's a salad I've been meaning to write about - it's called fattoush (فتوش).


It seems like the market for Middle Eastern salads outside of the Middle East is disproportionally dominated by tabbouleh, a salad, that when made right, combines ultra-finely chopped parsley with tiny pearls of fine-ground bulger wheat and other finely chopped vegetables. Fattoush is quite the opposite, at least when it comes to preparation - it can be thrown together in a matter of minutes, in a very rustic and hearty way that's all about flavor rather than embellishments. Tabbouleh is delicious though, don't get me wrong. Sometimes, however, I just want a quick and tasty, no-frill salad, and for moments like these I make fattoush.


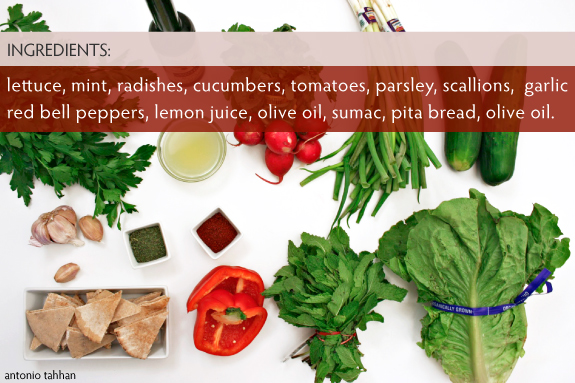
The mise en place can be overwhelming, but in one trip to the farmer's market you can have all these vegetables laid out on your table, too. The most exotic ingredient here is probably the sumac, which is a lemony, sour spice that can be found in most specialty markets these days and certainly any Mediterranean market you know of. If you like cooking Middle Eastern dishes, this is a spice that you should always have on hand.


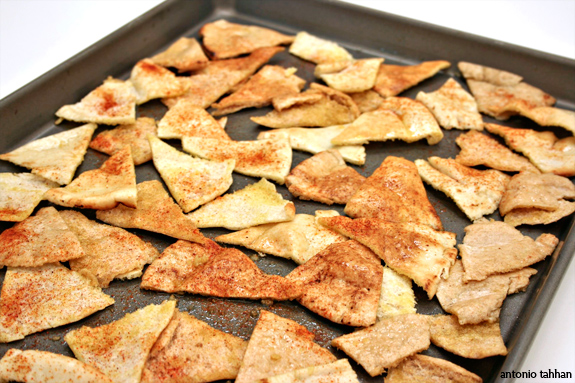
This is the part where some people might disagree: the bread. Probably the best (and most traditional) way you can prepare the bread for fattoush is by pan-frying the triangles in extra virgin olive oil, but that takes a long time and makes a mess of my stovetop. I prefer to toss the triangles in olive oil, sprinkle some sumac on the bread (something my grandmother taught me), and throw the whole tray into the oven/broiler, on high.


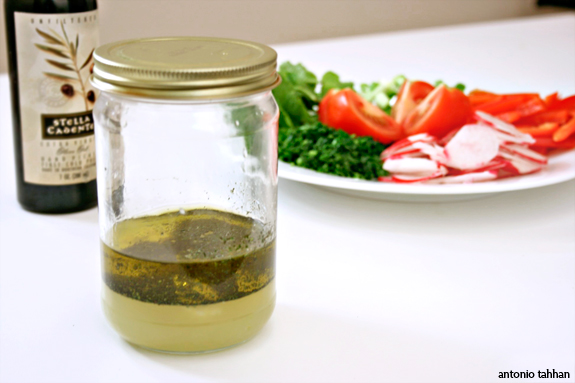
The dressing for this salad is equally simple, as promised. It's a combination of olive oil and lemon juice, with a sprinkle of salt and sumac - that's it. You can add dried mint to the dressing like I did, but that's completely up to you.


Click here to view or print the recipe.


This post was written by Tony


Are you interested in contributing to The Daily Tiffin? Drop us an email: thedailytiffin@gmail.com. We look forward to hearing your ideas.
A world outside of mozzarella & pepperoni

Sunday, June 28, 2009

Posted by Antonio Tahhan

A simple google search for kid-friendly recipes is scary. What shows up, in fact, is a harrowing slew of butter-saturated, sugar-filled recipes written with a complete disregard for health. I discovered this last week because I was looking for just that - simple recipes that I can make with kids.

My friend Beth invited me to cook in front of a class of kindergarten students. Her son is in the class and they were looking for someone to do a cooking demo for the kids' end of the year party - I was flattered that they thought of me and happily accepted.

I took this as my tiny opportunity to make a difference in the way these kids looked at food. While this was not the time to introduce them to the delicate flavors of perfectly-seared scallops or steak tartare, I wanted to cook with them something they're familiar with, but probably never had before. I decided to let them make their own pizzas. Instead of just mozzarella and pepperoni though, I brought with me a ton of different vegetables and all sorts of sauces for them to experiment with. Well-aware of the fact that the kids will have a short attention span that rivals mine, I also brought with me my pizza paddle and pizza stone so they could take turns sliding their pizzas into the oven.


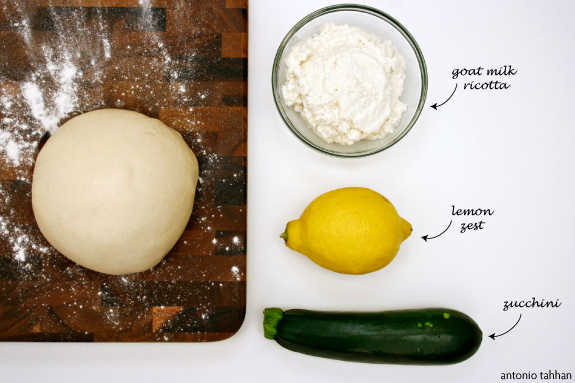
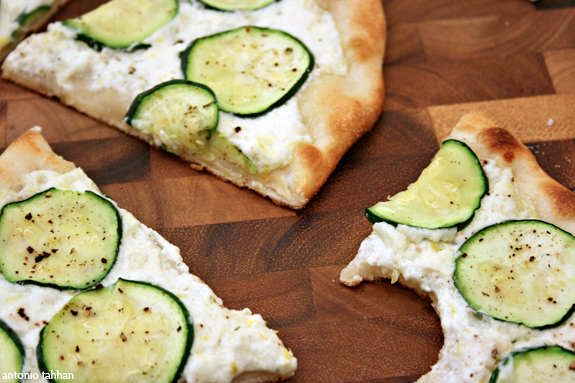
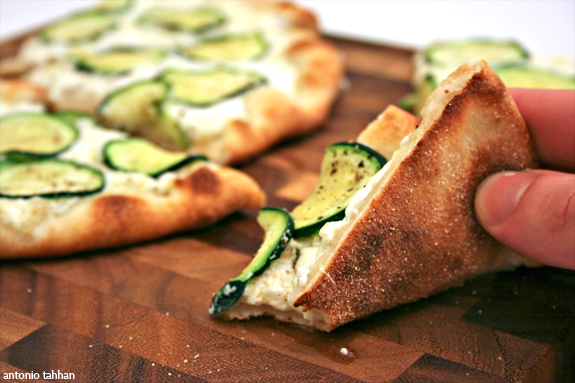
This is my first article for The Daily Tiffin, and it couldn't have come at a better time. Inspired by my pizza event last week and the smoldering heat of the summer, I decided to make a lemon-infused, goat ricotta, white pizza topped with thinly sliced zucchini. The flavors are light, refreshing, clean - perfect for the hot summer days ahead.


Count them - four ingredients; five if you include the extra virgin olive oil. This means no skimping on ingredients! I tried this same pizza with regular ricotta and it doesn't work. The wow factor just wasn't there. If you absolutely cannot find goat-milk ricotta, however, not to worry. Mix a semi-firm chevre (like Spanish Capricho de Cabra) with some good quality, fresh ricotta and you'll get a similar result. Like I said, it won't be spot-on, but you'll get pretty darn close.


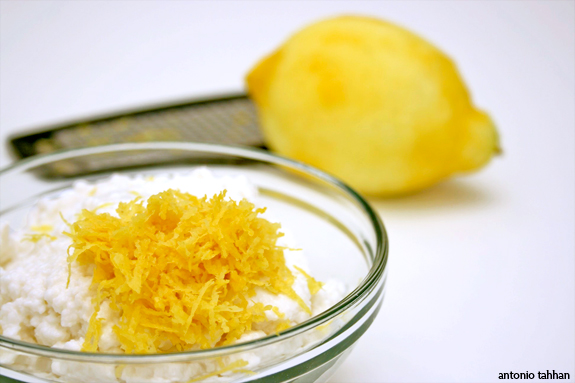
The lemon zest in the ricotta serves two purposes. Not only does it heighten the flavors of the goat cheese, but it also gives the pizza a clean, crisp flavor. If you can get organic lemons, I recommend them because their zest tends to be more flavorful than their non-organic buddies.


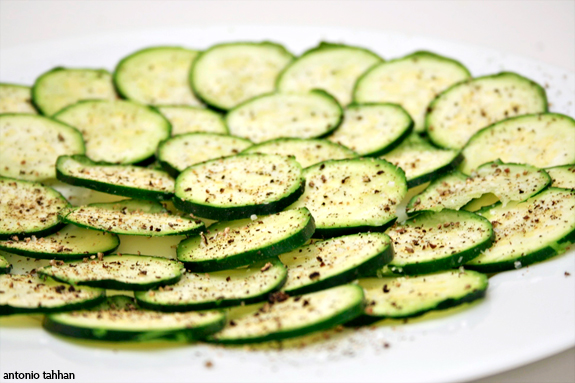
Zucchini in general has lots of moisture and moisture is the kryptonite, so to speak, of pizza. To remove some of this excess moisture you'll want to thinly slice the zucchini (preferably with a mandoline) and fan the slices out on a plate so they're not on top of each other. Then season the slices with salt and pepper and the salt will start to break down the cell walls of the zucchini, and thus allowing it to give up some of that moisture. Soak it up with a paper towel and your ready to roll.


The kids were shocked when I hinted to the idea of a pizza without red sauce. Their facial expressions were absolutely priceless. And although not many ventured down this path, I feel like those that did may have a bright culinary future ahead of them.


Recipe:
Ingredients:


  • 24 oz. pizza dough

  • 2-3 tbsp extra virgin olive oil

  • 1/2 lb goat milk ricotta

  • zest of 1-2 lemons

  • 1 zucchini, thinly sliced

  • salt and pepper, to taste


Putting Them all Together:

  1. Zest the lemon(s) and stir the zest into the goat ricotta

  2. Thinly slice the zucchini (preferably with a mandoline), fan out on a plate, season with salt and pepper, and cover with a paper towel to soak up some of the moisture.

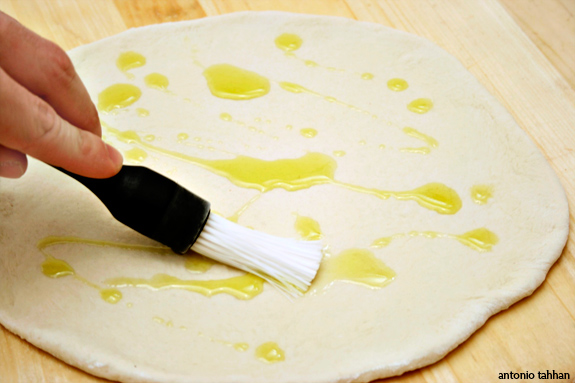
  3. Stretch pizza dough to approx 1/8" thickness - this pizza is better thin than thick - and brush a thin coat of olive oil over the top.

  4. Spread the goat cheese mixture over the top and top with the thin slices of zucchini.

  5. Preferably bake on a hot (550 degrees F) pizza stone for 5-7 minutes or until the crust gets golden brown.


This is why everyone should invest in a pizza stone:


This post was written by Tony


Are you interested in contributing to The Daily Tiffin? Drop us an email: thedailytiffin@gmail.com. We look forward to hearing your ideas.
Spring Vegetables: Rhubarb

Saturday, May 09, 2009

Posted by Andrea Meyers

The Daily Tiffin - Rhubarb stalks

Originally grown in Asia as a medicinal plant, rhubarb is botanically a vegetable but its tart flavor makes it a terrific ingredient in fruity desserts, compotes, and chutneys. Think rhubarb pie or galettes, rhubarb torte, rhubarb crumble, rhubarb jelly, and rhubarb drinks such as martinis and margaritas. Two popular red fruits, strawberries and cherries, work well with rhubarb and that’s perfect because they are all in season at the same time, so try them together in pies, jellies, or even sangria.

Whether you buy rhubarb from a produce stand, farmers markets, or grocery store, or perhaps grow your own, you’ll want fresh crisp stalks and deep red color, which usually indicates more flavor. The leaves are not edible as they contain the toxin oxalic acid, so cut those away completely. Stand the stalks in a glass of cold water for an hour to refresh them before cooking. Rhubarb stores well in both the refrigerator and freezer, and also cans well using the hot-pack boiling water method.

Growing rhubarb is relatively easy because it’s a perennial, it just needs lots of room to accommodate the large leaves, so pick a spot on the edge of your garden where it can take off and not cover your other plants. Rhubarb thrives in moderately acidic soil, so add some pine bark mulch if necessary. In warm climates it grows year round and produces two harvests each year, while in temperate climates the parts above ground disappear during the winter and grow back in the spring producing one harvest each year. You can force rhubarb in winter, just cover it with an overturned bucket or pot, and it will sprout more quickly and produce longer stalks and smaller leaves. To harvest rhubarb, just pull the stalks away.

Raw rhubarb is a good source of Vitamin K and a moderately good source of Vitamin C, Calcium, and Manganese, though cooking slightly reduces the amount of Vitamin C and Manganese and increases the Calcium.

For a delicious way to get started cooking with rhubarb, try this quick and easy recipe for spiced chutney, which pairs well with roasted pork, chicken, duck, or lamb. The red onion and cherries carry on the bright red theme and the rhubarb and apple cider vinegar add a delicious tartness.

Spiced Rhubarb Chutney

(adapted from Epicurious)

Equipment

6-quart Dutch oven or pot

Ingredients

3/4 cup (131 g) granulated sugar
1/3 cup (80 ml) apple cider vinegar
1 tablespoon minced peeled fresh ginger
1 tablespoon garlic powder
1 teaspoon cumin
1/2 teaspoon ground cinnamon
1/2 teaspoon ground cloves
1/4 teaspoon dried crushed red pepper
1-1/2 pounds (680 g) fresh rhubarb, cut into 1/2-inch cubes
1 medium red onion, chopped
1/3 cup (about 2 ounces/57 g) dried tart cherries

Preparation

1. Combine the sugar, cider vinegar, ginger, garlic, cumin, cinnamon, cloves, and red pepper in heavy large Dutch oven. Bring to simmer over low heat, stirring until sugar dissolves.

2. Add the rhubarb, onion and dried cherries. Increase heat to medium-high and cook until rhubarb is tender and mixture thickens slightly, about 5 minutes. Cool completely and store in a jar. (Can be made 1 day ahead. Cover and chill. Bring to room temperature before using.)

References

Wikipedia – Rhubarb

VideoJug – How to Harvest Rhubarb

Fruits and Veggies Matter (CDC) – Rhubarb

Health Alicious Ness - Rhubarb


This post was written by Andrea

Are you interested in contributing to The Daily Tiffin? Drop us an email: thedailytiffin@gmail.com. We look forward to hearing your ideas.
Fresh, Frozen, or Canned?

Saturday, April 18, 2009

Posted by Andrea Meyers

In my dream world, I walk out to my bountiful garden several times a day and pick whatever we need for the next meal, whether it’s tomatoes, onions, greens, cabbage, herbs, squash, eggplant, beans, corn, almonds, cashews, pecans, walnuts, berries, apples, plums, oranges, lemons, limes, mango, bananas, grapefruit, or passionfruit. All of these things are available year round and crops produce perfect yields, neither too much or too little. Now that is a dream! I would love to have all of those things growing in our yard year round, but like most people in the world the climate and soil type determines what we can grow and when, and the ever-changing weather affects the harvest. Some years we struggle to get enough and some years we have a bounty and store the excess.

When faced with an excess of produce from our garden, we preserve foods by freezing or canning, and each has its own benefits.

Andrea's Recipes - Pickled Green Tomatoes
Pickled Green Tomatoes.

Freezing

Frozen fruits and vegetables are often nutritionally equal or even sometimes superior to fresh as they are usually frozen just after harvest, locking in the vitamins and minerals that would otherwise leech from the food if stored in the refrigerator or on the counter. Harmful organisms are not destroyed in the process, but the freezing temperature inhibits growth. Some vegetables and fruits can be frozen whole, such as tomatillos and berries, but others should be cut, such as zucchini and carrots. Spread out on a baking sheet the produce you plan to freeze and leave it in the freezer for at least one hour, then put into labeled freezer bags.

Leafy vegetables such as spinach should have stems completely removed. Many vegetables should be blanched or even cooked before freezing, but fruits are often frozen after rinsing clean. Herbs can be frozen as whole leaves or chopped and put into ice cube trays, then frozen. Store the whole frozen leaves in plastic containers and frozen cubes in plastic containers or bags.

Always label everything you freeze with the contents and the date. Storage time for frozen produce varies from 1 to 3 months, but that is based on quality of the product not safety. Properly frozen foods are safe indefinitely.

Andrea's Recipes - How to Freeze Basil
Frozen basil cubes.

Canning

The canning process applies heat to the food to kill any harmful organisms such as bacteria, molds, and yeasts and destroy enzymes and remove oxygen that break down food. Heat does break down some beneficial vitamins (C, thiamine, folate), but most are stable when heat is applied, so canned foods still have health benefits. Canning at home requires some basic equipment:

  • boiling water canner or pressure canner
  • jars and lids
  • large pot for sterilizing jars and lids

Low acid foods such as vegetables and meats require a pressure canner to ensure the temperatures get high enough to destroy harmful microorganisms such as Clostridium botulinum, so don’t try to just boil them in an open pot. Fruits have enough acid and can be processed in an open pot (the boiling water method). Once you have canned your foods and the lids have properly sealed, they will be shelf stable for up to one year and can be stored without refrigeration until opened.

Andrea's Recipes - Home Canning
Canned jams and jellies.

We can pickles, jellies, jams, and fruit butters, and then freeze the rest. Last year we put up about 40 jars of canned goods and froze 5 pounds of tomatillos, several batches of pesto and frozen basil, and then slow roasted and froze about 5 pounds of leftover ripe tomatoes. We have enjoyed the bounty of our summer garden throughout the winter and are looking forward to doing it all over again this summer.

References

National Center for Home Food Preservation

National Center for Home Food Preservation – Freezing

National Center for Home Food Preservation – Canning

WebMD – Frozen Vegetables are Hot

U.S. Food and Drug Administration Center for Food Safety and Applied Nutrition

USDA Food Safety and Inspection Service – Focus on Freezing

University of Minnesota Extension – How to Prepare Vegetables for Freezing

Beyond Vegetarianism – Effects of Cooking on Vitamins

Andrea’s Recipes – Home Canning (Boiling Water Method)


This post was written by Andrea

Are you interested in contributing to The Daily Tiffin? Drop us an email: thedailytiffin@gmail.com. We look forward to hearing your ideas.

Save Money on Your Food Bill: Start a Kitchen Garden

Wednesday, March 11, 2009

Posted by Andrea Meyers

seedsMy husband and I have been growing our own vegetables and herbs for about 10 years. I started gardening by growing peppers, tomatoes, and herbs in pots on my apartment balcony and every year we try to have some kind of garden, both indoor and outdoor, no matter where we live or how much space we have. Some years have better yields than others, but we have always had a sense that we save money on produce and get the benefits of eating healthy foods without pesticides. We had never sat down and done the math on how much money we saved on our grocery bills, but we had done some calculations in our heads and felt confident that our efforts in the garden helped our food budget as well as our health.

Last week I got to read someone else's proof that growing your own produce is good for your food budget. Roger Doiron, the founder of Kitchen Gardeners International, published a post called "Economics of Home Gardening" which shared a detailed analysis of what his family had saved on all the produce they grew, and his statistics are amazing. He calculated their cost to run the garden and they weighed everything they harvested and calculated the cost using average prices from regular grocery stores, farmers markets, and Whole Foods. They spent US$282.00 to manage their garden, which included the cost of seeds and and supplies, soil testing, compost, and water. Their total harvest for the year was 833.79 pounds/376.03 kilos of produce. If they had purchased all of that produce rather than growing it themselves, their calculations showed they would have spent US$2,196.50 at average grocery store prices in their area, US$2,431.15 at their farmers market, and US$2,548.93 at Whole Foods.

Doiron's family grows a variety of produce, including tomatoes, potatoes, onions, various greens, beans, squash, herbs, and other things, in about 1600 square feet/148.644 square meters of growing space, which is quite large. In our own yard we had one 36 square feet/3.34450 square meter bed of growing space last year and had plenty of tomatoes, peppers, and herbs to last us for a couple months. This year we'll have 153 square feet/14.21 square meters and plan to grow a larger variety of produce. We're also going to try to extend the season with the cold frames that my husband built. I'm looking forward to getting our garden started this spring and enjoying even more savings in our food budget. We don't grow as much as Doiron does, but we believe every little bit helps, and his chart is proof of the economic benefits of growing our own produce.


This post was written by Andrea

Are you interested in contributing to The Daily Tiffin? Drop us an email: thedailytiffin@gmail.com. We look forward to hearing your ideas.

FLEXITARIANISM & NEW-AGE DIETS

Sunday, October 19, 2008

Posted by Deeba PAB

Hi, my name is Deeba & I blog @ Passionate About Baking...& beyond. I’m excited to be part of Daily Tiffin & am just over a year old to blogging. I worked for 8 years with British Airways as a Passenger Services Manager, & left when my daughter was born. Am a happy stay-at-home Mom, with 2 lovely kids (12 & 9, who hand me plenty of ups & downs) & an appreciative hub. Baking is my passion, & reading cookbooks, photography, art & craft are in every breath I take. Blogging has become a HUGE part of my life & I’m happy to be part of a wonderfully active & exuberant blogging community. I live in Gurgaon, which lies in the suburbs of New Delhi, the capital of India.

Stopped by school a week ago to pick the son after soccer practice & the daughter from her guitar class, & ran into a bunch of teachers avidly discussing diets, mainly vegetarian vs non-vegetarian. Coincidentally, the very evening, I read an article on diet trends & it offered an interesting perspective to something called part-time vegetarianism & new-age diets. The focus was on a flexitarian diet which seems to be gaining popularity & breaking new ground. Flexitarianism refers to being a vegetarian of convenience; or following the ‘eat-less-meat movement’.

The topic intrigued me, & I found that I had been sub-consciously veering towards flexitarianism for a while now. For the non-vegetarians amongst us, how often do you eat non-vegetarian food as part of your main meal menu in a week? Daily, alternative days, bi-weekly, or once a week? We have non-vegetarian food twice a week in our home on an average, & almost battle it through the rest of the week trying to encourage the kids to eat their veggies. Pasta days pass off peacefully as they love their pasta. Blanched French beans with a small dollop of cheese spread work fine, a cottage cheese wrap with a yogurt dip, onions & bell peppers is now being accepted more easily now. It’s easier for mine to down 2-3 helpings of fruit in a day than battle the veggies! I find cottage cheese a really good option, & a rice pulao with a raita goes off well too, but it’s the veggies that face most resistance. Veggie pizza makes them sing, as do savoury vegetarian pies like galettes.…but then cheese is processed & fatty. Oven baked potatoes are good news, but spinach doesn’t work.

Interesting options I found
Frankies/Roti Wraps
A Healthier Recipe for Mac & Cheese

Savoury Vegetable Ricotta Pies

There's an interesting article here on Daily Tiffin titled 'Vegetarian Kids'. It's a great write-up on introducing creative & diverse vegetarian meal options into your diet, & covers different food groups as well. I’m a flexitarian; what are you? Am interested to hear your thoughts on the 'veggie' front? Do you face a battle with veggies? Are you cutting back on meat for health or economic reasons? Do you think that cutting back to semi-vegetarianism can be quite beneficial to health, to the budget & to the environment/global warming?

Check out Tiffin Tuesdays which has some really tempting vegetarian recipes on offer ... Fried Halloumi Cheese Bento, or how about a potato salad with faux meatballs or falafel, appetizingly packed into a Potato Salad Bento! Collecting new ideas for serving ‘exciting vegetarian options’ to kids are priority on my search engine…thankfully, one doesn't have too wander to far.

The idea for my post germinated from a Newsweek article ‘Part-time Vegetarians’.


Are you interested in contributing to The Daily Tiffin? Drop us an email: thedailytiffin@gmail.com. We look forward to hearing your ideas.

This Post was written by Deeba from Passionate About Baking

Farmers' Markets In Your Backyard

Sunday, October 05, 2008

Posted by Meeta K. Wolff

Our guest writer this month is the vivacious and funny Donna Diegel from the fantastic blog Spatulas, Corkscrews & Suitcases. I am also extremely happy to announce to you that as of next month Donna will be joining the Daily Tiffin Team as a regular contributor. So, if you liked this article expect a lot more delicious and interesting posts from her in the future. Please help me welcome Donna to the Daily Tiffin.


PICT0401

Not that long ago our family had a stand at the local farmers' market. We had a wholesale bakery and organic gardens with 8 raised beds and a large greenhouse. The day before, in the late afternoon while my husband and son were wrapping cookies and sticky buns, I was out in the gardens picking produce. I triple washed 10 varieties of lettuce and greens, snipped 6 different herbs and hand picked 6 perfect edible flowers for each 8 ounce bag. After hours of hard work, I had 40-50 bags of organic lettuce mixes looking oh, so pretty, lined up like an army of green soldiers along the 8 foot kitchen counter. They were lovingly put to bed for the night in the big cooler in anticipation of going to the farmers' market the next morning. We always sold out, our loyal customers ordering more for the following Saturday. Writing this now, I get misty-eyed and realize I miss those farmers' market days dearly.

To a gardener or gourmet foodie, there are few things more rewarding than picking fresh veggies straight from your own garden. But what if you don't have a garden? Some of us aren't fortunate to have a piece of earth to call our own, a plot of soil to get our hands dirty in or to create a bushel of vegetables from a handful of seeds.
I no longer have my gardens. Instead, we live on a sailboat on the east coast of the USA. Gone are the raised beds, greenhouse and farmers' market. No matter how small my living space is or the harsh wind and salt water environment, I'm determined to have some living plants aboard. Right now, I'm looking at a large potted tomato plant on my aft deck loaded with Roma tomatoes and a few morning glories trailing up a pole. There's mint, lemon balm, two types of basil and a big pot of purple mums with two pumpkins on the bowsprit! But there's no way I can grow all the veggies I want on a boat. The next best option? My local Farmers' Market! 

Farmers' Markets Worldwide
What part of the world do you live in? North, south, east or west - no matter where you call home, chances are there's a farmers' market right around the corner. Changing seasons yield all sorts of wild and wonderful produce, but there's no doubt about it, each part of the globe is unique!   

There's a definite chill in the air now that autumn has unofficially begun in my Northeast corner of the USA. As the summer produce winds down, fall colors are beginning to pop up, not only in the foliage but at the farmers' market booths as well. Orange pumpkins, multi-colored gourds, rust colored mums and bright yellow sunflowers - it's a virtual feast for the senses! The further south and west you travel, the warmer the night air, and the farm stands are still overflowing with ripe summer produce! I'm sure you have vegetables I've never seen or heard of in your corner of the world - and visa versa!

What's In Season Now?

PICT0250 Heirloom Tomatoes
Heirloom tomatoes are still in abundance but you better get them soon or it will be too late. Gorgeous colors, shapes and textures, and they're mighty sweet and juicy! Use up some of those heirlooms and make a delicious Caprese Salad with some fresh basil for lunch. Or, try this Heirloom Tomato Galette with Red Onion Jam for a unique brunch idea!

Apples, Peaches and Pears Oh My! 
According to Wikipedia, "There are more than 7,500 known cultivars of apples!" Your farmers' market will only have so many choices to pick from, what's local to your area and what's in season. But still, with so many choices, how in the world would you know which one is right for baking, cooking or eating? Granny Smith, Golden Delicious, Cortland or the ever popular McIntosh? Here's a handy chart to help you choose whether to make homemade apple pie, PICT0337applesauce, baked apples or send one in the kids lunch boxes.
Peach supplies are starting to dwindle, but there's still some hardy varieties in the bins. Peach cobbler, peach pie and peach crisp with a scoop of your favorite ice cream or dollop of whipped cream will usher the summer out with a bang!
5000 Pear Varieties? If you thought you had a hard time choosing apples, the Wise Geek says "There are over 5000 pear varieties grown throughout the world, and England alone grows and recognizes about 100 varieties!" Bosc, Bartlett, Anjou and Asian Pears are ripe for the picking! You can make a pear galette, roasted pears, poached pears, caramel dipped pears or wrap some prosciutto around a slice of pear!  
 
PICT0422 - Copy (2) Corn, Maize, Mais, Granturco
Whatever you call it, sweet corn, butter and sugar corn or silver corn is plentiful, waiting to be grilled with a pat of butter and salt. The early corn has been picked and stalks are being cut and bound into fall decorations for your front porch. There's beautiful Indian corn to adorn your front door and popping corn for watching a favorite movie.   

Squash, Squash & More Squash!
Zucchini is almost done in New England, but in its place is the most wonderful selection of winter squashes. The farm stands are loaded with acorn, banana, buttercup, butternut, delicato, hubbard, spaghetti, sweet dumplings, the bizarre looking turban squash and pumpkins of all shapes, sizes and colors. Buy them to eat, store or decorate your home with!

Kale and Kohlrabi
Have you ever seen flowering kale up close? Deep purples, pink, white and green, they're a beautiful addition to your autumn flower beds and can take temperatures down into the teens! Fancy restaurants use it as a garnish for their plates, but don't eat it! They're only ornamental!

Kohlrabi (German Turnip) has to be one of the ugliest vegetables I've ever laid eyes on! Really! This odd looking vegetable is a member of the cabbage family and kohlrabi lovers say it tastes like broccoli or brussel sprouts. But with all its funny spikes and bulbous shape, I can't help thinking it looks like a space ship from an alien world! You'll never see me eating kohlrabi, but to each his own!

Bottom Line
I'll have to admit, I am a staunch supporter of buying local. There are many reasons why I'm so passionate about it. One of them is because I did have a farmers' market booth for years and it helped support my family. The way this economy has been lately it's so important to also support your community.

PICT0405

Everyone is struggling to put food on their table.
Here's a few reasons to consider:

  • Eating local is better for your health (you know where it's coming from - think e coli and salmonella).
  • Buying local is better for our local economy (it helps keep the money in our own back yards).
  • Buying local is better for our local farmers (no explanation needed).
  • So, consider shopping your local Farmers' Market! Everyone wins!


Can't find a local Farmers' Market? Try the Local Harvest website to locate one nearest you! Or Google Farmers' Market and add your own country!

Up next - Farmers' Market Alternatives:

  • "What is a CSA and how can you join one?" 
  • "What is a Locavore?"


About Donna
I'm an ex-caterer and pastry chef from Vermont that got tired of the rat race and sailed off into the sunset. That's not just a metaphor, I really did! I had my own wholesale bakery and catering business for over 15 years when I got tired and bored and said to my husband, "Let's get in the boat and sail away!"  Our 4 adult children and four grandchildren were given 2 years notice that we were running away from home. I gave the inn-keeper 10 months notice to find another chef. They all thought we were nuts and would never follow through. Well, we did, and here I am, 4 years later living, cooking, baking, photographing and blogging about it all on a sailboat in RI. I do this all on a rocking, rolling boat with a 2-3 burner stove and mini oven that I affectionately call my Easy-Bake-Oven! Gone are my 30 quart mixer, 10 burner stove and my organic gardens! My plan was to eventually end up in the Bahamas sipping Pina Coladas with little umbrellas with my toes in the sand. Instead, here we are on the East coast of the USA with ice around our boat every winter. It makes for a great story though, and I wouldn't change it for anything. The location? Yeah, I would definitely go south for the winter!  Read about my culinary and sailboat adventures on my blog,
Spatulas, Corkscrews & Suitcases. I'm also the Baking & Desserts Feature Writer for Suite101 which keeps me on an even keel and out of trouble!

Are you interested in contributing to The Daily Tiffin? Drop us an email: thedailytiffin@gmail.com. We look forward to hearing your ideas.

This Post was written by Donna Diegel from Spatulas, Corkscrews & Suitcases

Cheater Spinach Soufflé

Thursday, May 22, 2008

Posted by Ann


I love spinach soufflé, but I don't love the amount of eggs and the work involved in making it properly when I just want to get something savory on the table in a hurry, so I often fall back on a very versatile "cheater" version. This recipe is a perfect stand-alone for a light lunch, or as a side dish, and also makes a mean filling for stuffed mushrooms.


Cheater Spinach Souffle

1 (16 oz.) container Cottage cheese (fat-free optional)
3 eggs, well beaten
1/4 c. butter (less is optional)
1/4 cup feta
2 (10 oz.) pkg. frozen chopped spinach, thawed and drained
3 tbsp. flour
1/4 c. Parmesan cheese

Put the cottage cheese in large mixing bowl. Add the beaten eggs and mix thoroughly. Cut the cheese and butter into coarse pieces and add to the cottage cheese mixture, mixing well. Add the spinach and flour mixing thoroughly. Pour into 1 1/2 quart buttered casserole, and sprinkle the parmesan cheese on top. Bake 1 hour at 350 degrees.

You can also bake the soufflé in individual ramekins for a shorter amount of time (about 40 minutes), or use it to stuff mushroom caps. For stuffed mushrooms, just fill each cap and bake them for about 15 minutes.


Are you interested in contributing to The Daily Tiffin? Drop us an email: blogmeeta@gmail.com. We look forward to hearing your ideas.

This Post was written by Ann from Redacted Recipes

Tiffin Tuesday - ovenbaked veggies

Tuesday, February 12, 2008

Posted by jokergirl@wererabbits


Last monday was my first day at a new workplace. Since I wanted to give myself a little message (Ganbatte ne! Fight-o! and so on) and also, since I have to get up quite a bit earlier and after work, renovating a new apartment is on the plans for the evening, I packed a little breakfast box with leftovers for a good start in the day.


The box contains, starting from the top left corner and circling clockwise:
Potato halves, Maché sallad (I love this stuff), crème fraiche with chives to dip, a zucchini with a stick of feta, spiced sweet potato sticks, a mini-pie crust with some egg and half an olive, a few lumps of parmesan, eggplant with herbs, more sweet potato sticks, more salad and a mushroom stuffed with pesto, tomatoes and cheese.

Organic check: The ingredients from organic production are: potatoes, sallad, zucchini, feta, parmesan (the last of the one I imported from Italy *sniff*), mushroom. Everything else I either had already or couldn't find organic.


Everything in there that needed to be cooked was baked in the oven. The potatoes and sweet potatoes baked while I prepared the rest of the stuff, then I put the other veggies on a tray above it and when they were done, so were the potatoes.


Are you interested in contributing to The Daily Tiffin? Drop us an email: blogmeeta@gmail.com. We look forward to hearing your ideas.
This Post was written by jokergirl from WereRabbits


Meat? We Don't Need No Stinkin' Meat!

Tuesday, January 22, 2008

Posted by Glenna


Often for my lunchbox, and dinner at home too, I end up with a vegetarian form of whatever I make my husband for dinner. This meal is one of my favorites and will appear more often both at home and at work: Mushroom Ragout over Creamy Polenta, Brussels Sprouts blanched in vegetarian broth, large Spanish Green Olives, and Medjool dates and Orange slices for dessert.

Mushrooms are one of my favorite vegetables. I love their full rich earthy taste savored along with the brightness of green vegetables. They're the meat of the garden group so that's what makes them such a hearty anchor for this meal. When I made this meal, I found that it was easy to adapt it to my meat-eating husband by dropping a chicken breast into the mushroom ragout after I'd pulled my own portion out, while I myself didn't miss the chicken at all. I love polenta and it's rich taste from my youth. The Italians say polenta, my southern roots say corn meal mush. No matter. It all comes out beautifully in the wash.

And as for Brussels Sprouts? I thought I hated them. I've thought I hated them for all but this last year of my 42 years, but you know what? What I've found is that I do like Brussels Sprouts IF they're not gussied up. Add a bunch of butter and bacon or walnuts and orange and they take on a bitterness I don't like, BUT, if I simply blanch them in a little vegetable broth I could eat my weight in them. Who knew? Well I do now and enjoy them often.
Mushroom Ragout
Recipe by Glenna Anderson Muse
8 oz. Mushrooms (I had white buttons on hand), washed and quartered
2 Tbsp olive oil
1/2 medium onion, diced
1 cup red wine (I had cabernet handy)
1/2 tsp dried thyme Salt and Pepper to taste

Over medium heat, saute onion in olive oil. Add mushrooms and saute until browned and aromatic. Add wine, thyme, salt, and pepper. Cook until wine is reduced by half.

Polenta
Recipe courtesy Mario Batali
4 cups water
2 tablespoons salt
1 cup polenta or cornmeal
In a 3-quart saucepan, heat water and salt until boiling. Drizzle in polenta in a thin stream, whisking constantly, until all polenta is incorporated and mixture begins to thicken. Switch to a wooden spoon, pull off heat and continue to stir until thick as paste.
Brussels Sprouts, Like Revenge: Served Cold
Recipe by Glenna Anderson Muse

1 quart water
1 Tbsp vegetarian boullion
2 cups cleaned and quartered Brussels Sprouts
Bring water and boullion to a boil. Drop in sprouts for one minute. Drain in collander and rinse with cold water to stop cooking. Salt and Pepper to taste. Chill before serving.


Are you interested in contributing to The Daily Tiffin? Drop us an email: blogmeeta@gmail.com. We look forward to hearing your ideas.
This Post was written by Glenna from A Fridge Full of Food...and nothing to eat.