Showing posts with label Food. Show all posts

Gluten-Free Almond and Milled Seed Banana Bread

Friday, April 09, 2010

Posted by Hilda


GF Banana Bread
I have been having adventures with gluten-free foods lately. It's not that I need to eat gluten-free foods suddenly or anything, it's more that I first made and ate gluten-free foods about fourteen years ago thanks to my friend Chloe, who was having severe food allergies at the time, and remembered recently that gluten-free food could be quite lovely with its seeming resurgence on food blogs.
I always have some allergy and food-intolerance recipes handy just in case a friend who suffers from one comes over and, in this particular instance, I'd been wondering how different it would be to eat gluten-free banana bread having never tried that (but eating my regular share of gluten-packed banana bread).

I have an unabashed love of bananas; I think they may be the perfect food. I know some people hate them but, frankly, I don't get those people; it seems everyone in this house loves them so banana bread is always well received, and I've taken to trying different versions lately having spent so many years with a favorite recipe. We don't often end up with overripe bananas here simply because they're eaten up so quickly but, on occasion, particularly when one too many visits have been paid to the store, we end up with several sets of bananas and I have to use them up. You can of course freeze bananas so that you're not forced to bake with them until you're ready, just be aware that if you do the peel turns completely black though the flesh is unaffected.

Banana Tree
Of course there's no dearth of gluten-free banana bread recipes on the web with all the gluten-free blogs, but there's no telling what recipe will look appealing to you when you do a search for something as popular as banana bread. I settled on this recipe from Gluten-Free Goddess for snacking banana bread and set about figuring out how I would make it with less almond flour. I love me some almonds but I didn't really want this to taste mostly of almonds and banana.

I've spoken on my blog about a milled seed mix made by Linwoods which is made up of milled flaxseed, sunflower and pumpkin seeds. I made gluten-free muffins with it and they were delicious; I actually thought the mix was milled nuts until I took a good look at the package; due to my having made so many muffins with it, I decided to make some gluten-free banana bread instead with what remained. I didn't have enough of it to make up the entire portion of "flour", so I ended up mixing almond meal with finely chopped hazelnuts and what was left of the milled seeds.

I was pleasantly surprised by the result. I thought it would be good but I didn't realize how good it would be, and the best part of it was that it was incredibly light and moist. The recipe below is the most basic version. You could of course add other spices, perhaps whatever mix you usually use in your banana bread. Karina's version calls for 2 cups of flour-substitute, I added a bit more because I had an extra 1/4 cup of milled seeds left in the bag; if you look at the comments on her post, people substituted all different kinds of flours, ground nuts, etc... so feel free to experiment with your own kind of flour or non-flour mix.
The next time I get a bag of milled seeds, I'm definitely making this banana bread again, along with a few dozen muffins. You never know when the urge to snack might hit you.


Gluten-free Almond and Milled Seed Banana Bread
adapted from the Gluten-Free Goddess here

1 cup (100g) almond meal
3/4 cup (75g) milled seeds
1/2 cup (60g) finely chopped hazelnuts (or pecans or whatever kind of nut you want)
1 tsp baking soda
1 tsp baking powder
1 1/2 tsp ground cinnamon
1/4 tsp sea salt
2 large eggs, at room temp
1/3 cup (80ml) extra virgin olive oil
1 cup (100g) light brown sugar
3 medium very ripe bananas, cut up, mashed
2 tsp vanilla extract

- Heat oven to 350F (180C).
- Grease a loaf pan very lightly. No need to flour it. (I used cocoa for the fun of it to see if it would make a taste difference, it didn't).
- In a small bowl, mix the almond meal, milled seeds, and hazelnuts with the baking soda, baking powder, sea salt and spices. Combine well. Set aside.
- In a large bowl, beat the eggs until light and fluffy; add the olive oil, brown sugar, banana mash and vanilla. Beat well to incorporate.
- Add the dry ingredients to the wet mix and beat for a couple of minutes.
- Pour the batter into the pan and bake for ~35 minutes or until done. A pick stuck in the center should come out clean.
- Cool the bread completely on a wire rack before slicing or serving.
It will keep for about 3-4 days well wrapped or in an airtight container.

This post was written by HILDA


Are you interested in contributing to The Daily Tiffin? Drop us an email: thedailytiffin@gmail.com. We look forward to hearing your ideas.

When Popeye Doesn’t Quite Help Them Eat Spinach!

Thursday, March 04, 2010

Posted by Aparna Balasubramanian


Getting one’s children to eat what’s good for them must be one of the most difficult exercises in life, perhaps. I think every person who has ever put in this kind of effort deserves a special star on a walk of fame!

Our daughter proved quite early on, that she had very strong ideas about what she would and would not do. Despite this, we didn’t really have too much of difficulty getting her to eat as a toddler. We just faced the usual “I don’t want this!” or “I’m not hungry!”
Akshaya never was a fussy eater, but as she grew older she started developing strong dislikes for certain foods. While this was perfectly understandable, we had to ensure that these dislikes became the exception rather than the norm.

She didn’t (and still doesn’t) like many fruits. She will eat most vegetables but will not eat most types of salads. When told vegetables in their raw form in salads are healthy, her stock answer always has been “……but I’m not a cow!”
When we were growing up, things were different. We didn’t have a wide variety of foods/ cuisines to choose from and mostly ate whatever was cooked and served without too many questions. Our parents didn’t really have the time or inclination to hold too many discussions on matters regarding our food likes and dislikes.


A lot of us would have grown up being told how Popeye was strong because he ate his spinach and lots of it. If I had told my daughter about Popeye, she would probably asked me “Pop-who???”
Then I would have had to contend with the following kind of questions:
hy did she need to eat spinach just because someone else (who she had never heard of) did so?
Did I honestly think she would want to do something that was done by someone who looked like Popeye? And what was the deal with Popeye and spinach anyways?

As it turns out, it seems stories of Popeye and spinach are attributed to the publication in 1870 of a study by Dr. E von Wolf which mistakenly attributed to spinach ten times its actual iron content.

Children need all the nutrition they can get during their growing years and in amounts much greater than an adult does. It seems a bit of a paradox that most of these nutrients seem to be in foods that children need to be persuaded to eat!
So how does one get children to eat what’s good for them, without too much of a fight on one’s hands?

There is no “one fits all” solution to this question but we have, over the years, found some ways to get our daughter to eat healthier. We’ve won some and lost some.
Children being the fickle creatures they are, will tell you they love some particular food one day and then tell you that they don’t like it anymore, a couple of weeks later!
What is important is to start laying the foundation to healthy eating choices as early in childhood as possible, so that it becomes a habit. Here are some things that worked for us.

It is important to lead by example, because children pick up all our habits (especially the undesirable ones!) very easily. So if we tell our kids to eat up their vegetables, we have to do it too!!

In our home, we have certain mealtime rules and they apply equally to adults and child. One is that everyone at the table has to have a portion of whatever is cooked for that meal, even if we don’t really like it very much. This rule is something I grew up with and even though I fought it as a child, it has held me in good stead as an adult.

I used to take my daughter along when I went shopping for groceries, vegetables and fruit. She would help me pick out things and has learnt much that way. She is now quite adept at reading the small print on packaged foods.
She would also help me when I used to bake or cook dinner. She was always very happy to eat whatever she had “cooked/ baked”. This I found, along with the innate curiosity in children, was a great way to introduce her to a lot of foods.

Introduce your child to whatever tastes your chosen diet includes or allows, as early as possible. Once a child’s taste patterns and habits are set, it is not easy to break them. At the same time, it is important to recognize they have some definite foods they don’t like.
Variety at the table also helps, since a lot of times I find my daughter complaining that the food I cook is boring! This is where my blogging has helped as there’s more variety in my cooking now, though she insists that I now am more interested in feeding my blog than her!!!

Keeping them away from “undesirable” foods is a sure way to ensure that they always choose junk food as the taste of this is addictive! When Akshaya discovered junk food, that’s what she liked (and still does a lot of the time) more than home-cooked food.

So we make allowances for this when we eat out and then she gets to choose what she wants to eat. It has now come to the point where she does like home-made versions of many of these too. However, more often than not, the lure of a Pizza Hut/ Dominoes Pizza or a McDonalds proves too much to resist.
I have finally arrived at two largely fool-proof strategies that work for me. What strategists do in boardrooms isn’t a patch on our strategizing, as they don’t have to contend with unpredictable teenagers!

The first one is deviousness.
My daughter does not like fruits very much. So what I do is hide them or dress them up in foods she likes. So I turn fruit into fruit milkshakes, gelatos and ice-creams. I bake them into cakes and muffins.
Cakes have butter and sugar, but I can control how much of it goes into them and younger children and teenagers do need this in adequate amounts for healthy growth. I put oats in her cookies and bread.

Akshaya will not eat tomatoes, but loves pizza and pastas with my home-made tomato sauce. She loves macaroni and cheese so I make a version that’s full of vegetables! She doesn’t like spinach (yeah, Popeye wouldn’t work with her!), so I add the puree to chapathi dough to make “green” chappathis.
And the list goes on………………..

The other one is that I let Akshaya make some of her food decisions. She prefers to carry home-made lunch rather than eat at the school canteen. So I let her decide what she wants for lunch and this ensures she eats what she takes to school.
On many weekends, she decides what we should have for Sunday lunch and I cook it up as “healthy” as I can without “spoiling” it for her. (Though she feels I haven’t been very successful on this count.)
Of course, it is a wise mother who doesn’t use the “H” word in front of her kids!

I think I’ve rambled on long enough for now. I would love to hear how you all handle your children’s food dislikes and maybe learn a thing or two or three. As far as I’m concerned, mothers can never have enough “weapons” in their armoury!


This post was written by Aparna


Are you interested in contributing to The Daily Tiffin? Drop us an email: thedailytiffin@gmail.com. We look forward to hearing your ideas.

CREATURES OF HABIT

Wednesday, March 03, 2010

Posted by Jamie

COUNTRY CAPTAIN


Aren’t we all? Work, school, family. Out of bed at 7, breakfast the usual café au lait with 2 pains au lait with just a dollop of cherry preserves each, a few minutes more in bed reading and chatting with hubby, then walkies for Marts. Strictly the same routine, over and over again, endlessly repeated. Mornings followed by work all day, dinner then a bit of tv, Marty hopping insolently from lap to lap deciding on which one of us shall be graced with his warm, furry company for the evening or if he’ll simply snort his discontent and slink back to his own cushion. Weekends cozy at home. Maybe a morning saunter to the market, basket in one hand, husband’s hand in the other, watching rugby (in season) or a run for Marty in the vineyards (in the other, sunnier season). Dinner out once a week, vacations spent at home.

There is something so comforting about routine, that old expected pattern, accustomed to what we will find each day. It all becomes second nature, a natural reflex, and we can concentrate on other things secure in the familiarity of knowing what will happen next, as comforting and familiar as our favorite worn-in pair of jeans or that old woolen blanket we wrap ourselves up in on chilly winter afternoons, our hands wrapped around a mug of steaming cocoa. We are all creatures of habit and as much as we love change and adventure, the excitement of the unexpected, the thrills and chills of risk and chance, we still prefer the ease and well-being of our little, everyday habits. In this mad, mad, mad world, what feels better than that?

Our eating suffers from force of habit as much as our daily routine. Don’t we always want the same cake every birthday? Don’t our holiday tables groan under the weight of the same bounty of goodies, the turkey and stuffing, mom’s this and grandma’s that, the same pies for dessert, the same cookies baked year after year to hand round to friends at Christmas? Maybe we call it tradition rather than habit, but habit by any other name is still a habit. Remember when we were kids? A bowl of cereal drowned in cold milk every morning before we biked off for school; Fruit Loops were grabbed every morning for maybe 6 months, then Cap’n Crunch, then Lucky Charms, but the basic routine never changed, nor did the current fad. The same sandwich and cookies were wrapped up and dropped into the brown paper sack for lunch, the same Ding Dongs or Little Debbies, always cream-filled chocolate whatevers, for the after-school snack. The same games played every afternoon with the same friends knowing that at 6:30 each evening we’d find ourselves scooting our chair – and always at the same place – up to the table for dinner. On the nose. We knew that one day a week dad threw steaks on the grill to go with baked potatoes and he would make pancakes for dinner regularly. Like a parent’s love, these daily habits made us feel safe and protected.


Why should my own little family now be any different than my family all those years ago? Breakfast, lunch and snacks are like clockwork and hands grab for the usual. Husband is happy when there is a warm lunch on the table at 1 but is ever so content with bread and cheese followed by a piece of fruit. Every day. Clem expects to find the same foods in the refrigerator each time he pulls open that door and complains loud and long if they aren’t sitting and waiting for him when expected. Persnickety son is the worst of the lot and the most stuck on habit. Obsessively stuck. He regularly hands me over his list of the foods he likes, the main courses he will eat, the desserts he will deign accept to taste. And always at the same time of day. A little too early and eyebrows raise and one asks “Why? What’s wrong?” They grab the same thing every morning for breakfast, the same thing every afternoon for snack. And going out “en famille” means the same, familiar pizzeria. The same cereal, brands of dried pasta and cookies grace our pantries, my hands automatically reach for the same flavor jelly and same bag of coffee at the grocery store, we are partial to the same chocolate cake, same snack quick bread and the same coffee cake and they are requested – and baked – over and over again.

When one is a food blogger, eating habits can get in the way. I try and feed my blog yet my family claims that they should come first! Make the same chocolate chip cookies again? But they are already posted on my blog, I need something new, something different, something unique! Arms are thrown up, eyes rolled, groans escape from lips and one or the other stomps off in anger and disbelief. I try something new, a gorgeous charlotte or a panna cotta or fruit instead of chocolate chips and all hell breaks loose! “But you know what we like! You know we want to eat the same things all the time!

And dinnertime as well. No wonder it’s called comfort food: the couscous in winter, the Asian salad in summer, hamburgers on a bun with that side of fries once a week and homemade pizza every Friday night followed the day after by hot-from-the-oven focaccia made with the leftover dough. They feel comforted getting what they expect, are happy in the thought that it tastes just the same week after week. In a world gone mad, long, tiring, stressful days, being pushed this way and that by colleagues’ whims or teachers’ sudden demands, one a little too tired with the ways of the working world, the others just learning the ropes, living each day with the unexpected, the reckless and the impulsive, isn’t it nice to be able to step over that threshold, close the door – and the world – behind you and be greeted by the familiar, the warmth of a cozy livingroom, the comforting smells wafting from the kitchen, a mother’s smile or a spouse’s embrace, the warm, wet nose of a dog thrilled to see you no matter what and pull a chair up to the table and sit down to a meal you know and love so well.


Ever since the first time I made this traditional Country Captain, it has become a family favorite and a regular on our kitchen table. Warm, comforting, flavorful without being spicy so it fits everyone’s bill, easy and quick to put together, it is the perfect family meal simply served over rice, pasta or, as I have done here, creamy polenta. This dish, whose earliest reference was found in the 1857 Miss Leslie’s New Cookery Book, has a somewhat long history, but it is thought to be an English dish brought originally to the table by Sepoys, the Indian officers serving Britain in East India, eventually making it’s way to the United States. But the East Indian influences are indeed there – the curry, the raisins and almonds. It is a soothing, warming chicken dish with a deep, rich tomato sauce spiked with curry powder and garlic and sweetened by tender golden raisins or currents, the almonds adding a nutty crunch into the bargain.


COUNTRY CAPTAIN
Slightly adapted from Molly O’Neill’s New York Cookbook

¼ cup (about 30 g) flour for dredging
1 tsp salt
Freshly ground black pepper
1 broiler chicken (3 ½ to 4 lbs/1 ½ to 2 kg) or equivalent weight in favorite pieces, well-rinsed and patted dry, excess fat and skin trimmed and cut into pieces
4 Tbs (60 g) butter or margarine
1 medium to large onion, finely diced
1 green bell pepper, cleaned and diced
1 red bell pepper, cleaned and diced
1 clove garlic, minced
1 ½ tsps curry powder
½ tsp dried thyme leaves
1 can (16 oz/450 g) stewed or crushed tomatoes
3 Tbs golden raisins (or currents if you prefer)
1/3 cup blanched, slivered almonds


Place the flour and salt in a wide bowl and add a very generous grinding of black pepper, at least ¼ tsp and toss to combine. Dredge the chicken pieces in the seasoned flour to coat completely, shake off the excess flour and place the pieces on a piece of waxed paper.

Melt the butter or margarine in a large, nonreactive, heavy bottom pot or Dutch oven over medium heat. Add the chicken, just a few pieces at a time so as not to crowd, and cook until the chicken is browned all over, 3 to 5 minutes per side. Remove the chicken as it is browned to a clean plate while you continue browning the rest of the chicken.

Once all of the chicken has bee browned and removed from the pot, slightly lower the heat and add the onion, the peppers, the garlic, the curry powder and the thyme and toss until blended. Add the stewed tomatoes and stir, scraping up the brown bits sticking to the bottom of the pot from the chicken.

Return the chicken to the pot and push it down under the sauce. Add a bit of water just until the chicken is barely, but not quite, covered. Bring to the boil, lower the heat to low and allow the Country Captain to simmer (you can put a lid on the top but I usually keep it just slightly ajar) until the chicken is cooked through and beginning to fall off the bone – about 35 to 40 minutes more or less. Stir the sauce occasionally and add a bit of water if the sauce evaporates too much. You do want a thick sauce at the end.


5 minutes or so before the end of cooking, stir the raisins into the sauce. Serve the Country Captain over rice, pasta or polenta sprinkled with the slivered almonds.


This post was written by JAMIE


Are you interested in contributing to The Daily Tiffin? Drop us an email: thedailytiffin@gmail.com. We look forward to hearing your ideas.

Can Healthy Meals Be Kid Friendly Too?

Tuesday, January 26, 2010

Posted by Aparna Balasubramanian


I am Aparna, I write a vegetarian blog at My Diverse Kitchen and am excited to join the team at The Daily Tiffin. When Meeta invited me here, she suggested I could write posts related to "healthy kid-friendly meals".
While I am not an expert in this area, I have a 13 year old daughter who has a very strong opinion on most things, including food. Trying to ensure that she eats food which I deem healthy and she likes is not a very easy thing to do.

I am not an authority on child nutrition even though I did study biochemistry, nutrition and dietetics in university a long time ago. I have, over time, discovered (like many others) that no degree in anything remotely connected with health, diet and nutrition can prepare you for the task of getting your child or children to eat what you think is best for them. It is always about what they want to eat, which mostly is what you would prefer they didn't!

Funnily enough, I never had much problem with getting my daughter to eat when she was younger. She wasn't a very fussy eater though she could take hours to finish a meal. At that point she used to find the rest of the world more interesting than food, and often had to be reminded that she needed to finish what was on her plate!

At the age of 8 or so, whenever we went grocery shopping, Akshaya would check all the product labels to ensure that they were vegetarian, contained no trans-fat, preservatives or colour! Whenever we ate out, she would refuse aerated drinks insisting that she only drank water!!
In fact, I started baking a lot more at home because she didn't like the "funny" taste of store bought cookies/ biscuits and cakes.

Sure, she had her own likes and dislikes where food was concerned and there would be occasions when we would argue over her not eating something. A large part of the time reasoning things with her or giving in to her demands occasionally kept the balance going.

Then around the time she turned 10 something happened. Apparently, teenage sets in these days a lot earlier than it did in our times! And our daughter's food tastes and preferences underwent a dramatic change! She discovered junk food with a vengeance!
Pepsi or Sprite was so much "cooler" than water, traditional food just didn't have the "style" that a McPuff, a McVeggie or a McAloo Tikki from McDonalds did and how could a dosa (Indian savoury crepes) ever stand up to "ze pizza"?


One of my "healthy" vegetable burgers!


That's when the question "Can Kid Friendly Meals Be Healthy?" really became relevant for me. I am happy to have discovered that that the answer is definitely a "Yes!" Well, most of the time anyway.

We found ways to ensure that most of what our daughter eats is on the healthier side. This is not to say that she and I do not argue over what she eats. In fact, one of her pet peeves is her inability to understand why I have to cook and insist on her eating "healthy and boring" food! Actually, she does understand this but I think that she doesn't want to accept it, most of the time.

We have now arrived at a sort of compromise where she now accepts my need to ensure she eats healthy food while we accept her need to occasionally fulfill her "unhealthy" food cravings.


This post was written by Aparna


Are you interested in contributing to The Daily Tiffin? Drop us an email: thedailytiffin@gmail.com. We look forward to hearing your ideas.

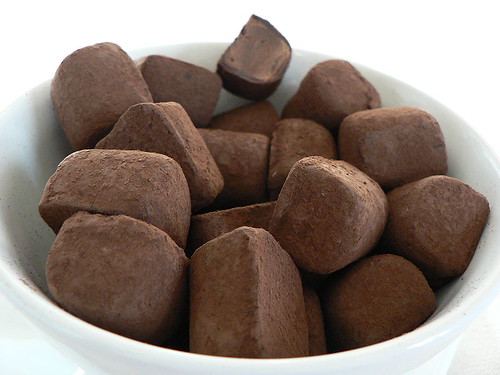
Easy Basic Chocolate Truffle recipe

Wednesday, January 20, 2010

Posted by Mansi

easy-truffles-recipe
Image courtesy Wikimedia Commons

Valentine's Day is just around the corner, and if you are not done with your fair share of Holiday treats, then here's another occasion to celebrate love by enjoying these delicious Chocolate Truffles with your loved one! Everyone loves truffles, and what I love the most is the fact that you can virtually make numerous truffle recipes, as long as you nail the basic Ganache recipe. Plus, you can easily preserve these candies for almost 2 weeks when refrigerated. So here's the easiest recipe to make Basic Chocolate Truffles - go ahead and find your variation by selecting any one of the suggested truffle ideas below!

Basic Chocolate Truffles
Makes about 1.5 pounds chocolate

Ingredients
1 cup Crème Fraîche (or heavy cream)
14 oz. Dark Chocolate (use very high quality, 70% cocoa, chocolate - or very high quality unsweetened baking chocolate.)
8 oz. Additional Dark Chocolate
11/2 cups Cocoa Powder (the highest quality you can find)
3 tbsp. Butter (optional)

Method

Making the Ganache:
1. Break chocolate into small pieces and put in a large bowl.
2. Bring cream slowly to a light boil.
3. Pour boiling cream over chocolate and keep stirring until all the chocolate has melted and the batter is uniform.
4. If you want to add butter, do so now, before the batter cools, and thickens.

When the ganache is warm it is very creamy. You can thicken it by whisking it for a few minutes, or by putting it in the freezer for 30 minutes or until set (it should have the consistency of fudge). You want the ganache to be just thick enough to easily form the truffle balls.

Making the Truffles
Using a melon baller or a small spoon, form rounds of the ganache and place them on a baking sheet lined with parchment or wax paper. Let the truffles harden in the freezer for about 15 minutes. After removing truffles from the freezer, roll them between your hands into marble-size spheres, squeezing gently (try to do this quickly, otherwise they'll become too soft).

While you form the Truffles, Melt the rest of the chocolate in a double-boiler or in the microwave. Then Dip each ball in the melted chocolate and then roll it in the cocoa powder.

Variations:

1. Roll the truffles into ground pistachios to make Pistachio Truffles.
2. Soak some orange rinds in some Grand mariner or other sweet liqueur and add to the Ganache to make a special version.
3. Add hazelnut or Coffee flavor to the ganache then roll the truffles in ground hazelnut powder to make nutty truffles.

There, enjoy Valentine's Day with these delicious truffle recipes. If you are looking for more fun, try these Chocolate Truffle Cookies instead; they will leave an impression, guaranteed! And for a more memorable holiday, start your morning with breakfast in bed, serving these hot and healthy Strawberry Pancakes, follow with a delicious yet stress-free recipe for Baked Macaroni in Cream Sauce and end your evening with a glass of chilled Raspberry Ice Cream Float for dessert!


This post was written by Mansi

Are you interested in contributing to The Daily Tiffin? Drop us an email: thedailytiffin@gmail.com. We look forward to hearing your ideas.

Quick Indian

Friday, December 18, 2009

Posted by Bina

A perfect example of an oxymoron! I bet it's what some of you are thinking. Especially if you believe a common misconception about Indian cooking; that it is complicated and time-consuming. In reality, it's quite the opposite. Just look at the delicious, quick and healthy Indian meals made with little fuss in millions of Indian home kitchens everyday. Food that makes its way into lunch boxes packed early in the morning, evening meals with family and leisurely meals with friends. You can do it too. It is not difficult, I promise!

The series will hopefully inspire you to cook Indian food in your own kitchen. The recipes over the next few months will be simple, vegetarian dishes that are typical to everyday meals-vegetables, legumes (lentils and beans), rice, breads, snacks/appetizers, chutneys and desserts. Don't be fooled by their simplicity though. Many of them are also great for entertaining, and show up on my table when friends just drop by and stay for a meal, as well as for formal parties.

All the recipes are fairly quick but factor in some time for prep work like chopping vegetables, soaking beans etc. You can, of course, use frozen vegetables when possible. Canned beans are really convenient but make sure they are rinsed well before cooking. As far as cookware and tools go, you will need a very basic coffee grinder for the spices and a blender for the chutneys. I know many Indian cookbooks suggest using a kadai (a wok shaped vessel) for cooking but it isn't a must. I use regular, heavy-bottomed pans (nonstick and stainless steel) and only use the kadai for deep-frying.

Spices

Any talk of Indian cooking is immediately followed by that of spices. The seemingly endless variety can be very daunting. It's true....there are a lot of spices used in Indian cooking in general. However, you don't need to have all of them in your pantry, and not all of them are used together at the same time. Usually, it a combination of just a few spices that go into the making of a dish. Speaking of spices, a wonderfully detailed explanation about individual spices can be found here.


The initial recipes will use spices that are easily found in your grocery store. As we move along, we will add others like fenugreek, asafoetida, curry leaves etc. that might require a trip to the local Indian or Asian store. You can buy most of the spice powders/mixtures readymade. I do. Except coriander powder and garam masala, which I make at home. It is really not hard to do and makes a huge difference to the taste. Garam masala is quite possibly the most recognized among all the Indian spice mixtures. Many recipes for garam masala are very elaborate and are jealously guarded secrets. Mine is simple and not a secret at all!

Garam Masala

3 tablespoons cumin seeds

6 tablespoons coriander seeds

1 1/2 tablespoons black peppercorns

3 tablespoons cardamom seeds

3 sticks whole cinnamon (about 2 inches long)

1 tablespoon nutmeg, freshly grated

1 1/2 tsp whole cloves

Method

  • Put all the above spices except the nutmeg powder in a heavy bottom skillet or pan.


  • Dry roast it on medium to medium-high heat stirring very frequently. Keep stirring till the spices start turning darker.


  • Take the skillet off the heat and transfer the spices into a plate to cool.


  • Add the nutmeg.


  • Once the spices come to room temperature, grind it to a fine powder in the coffee grinder.


  • Store in a bottle with a tight lid (I use jam/jelly bottles)


  • Herbs and stuff


    Ginger, garlic, mint and cilantro are easily found in stores. You can use jalapeno, serrano or other hot peppers instead of the Indian or Thai chillies. The curry leaves will require a special trip to an Indian and Asian grocery store. I have found that the best way of storing them long term is by freezing. However, directly freezing fresh curry leaves results in the leaves turning black over time and also having an off taste. Flash-frying it first and then freezing works very well for me. Just remember to add the frozen leaves directly to the dish while cooking and not in the tempering oil (The moisture in the frozen leaves makes the oil splutter). When added during cooking, the leaves get rehydrated and look and taste very much like the fresh ones.

    The following recipe can obviously be scaled up or down based on your needs.


    Preserving Curry leaves

    Ingredients
    1 cup curry leaves
    3/4 tbsp canola/peanut/vegetable oil

    Method

    1. Wash and dry the curry leaves (A salad spinner is great for this)
    2. Spread them on a kitchen towel and leave them for about 10 minutes.
    3. Heat the oil in a wide skillet (not nonstick). The oil should get very hot but not smoking
    4. Add the curry leaves and stir lightly for about a minute on medium heat. The leaves will make a crackling sound and start turning crisp.
    5. Transfer to a plate and cool completely.
    6. Put in a ziploc bag and freeze for upto 6-8 months. (I have frozen them for a year with no loss of color and flavor).

    Stay tuned because future posts are all about recipes that will hopefully have you cooking up a storm!


    This post was written by Bina


    Are you interested in contributing to The Daily Tiffin? Drop us an email: thedailytiffin@gmail.com. We look forward to hearing your ideas.


    Foods You Thought You Knew

    Friday, November 13, 2009

    Posted by Hilda


    So I think I’m probably going to be known as the baby-lady around here, but as many of you know, it does take over your life doesn’t it... but in a very good way.
    Today we are going to talk about carrots. That’s right, you heard--err, read me correctly, carrots. Why are we going to talk about carrots? Because I use them a lot in my baby’s food and because they’re quite interesting in more ways than you’d think.

    I guess there could have been many other vegetables I could have written about for this post but I picked carrots because -WARNING: I’m about to admit something I probably shouldn’t here so get ready- I only just discovered- NO not carrots silly, of course I’ve known carrots forever, who hasn’t- rainbow carrots. I’ve only just discovered rainbow carrots. I didn’t actually know there were other colors of carrots than orange, (did you?) so imagine my surprise when my husband brought home these beautiful carrots in shades of purple and greenish-yellow and told me there even were red carrots out there somewhere.
    Upon doing a little bit of research I discovered that carrots, in fact, were not orange to begin with. That seems odd doesn’t it? It seems like no actually they always were orange and then some guy with too much time and a lot of carrot seeds laying around started making hybrids and coming up with cool funkedelic colors, but it just seems that way, that’s not really what happened.
    In reality, it’s not exactly clear what the chronology of the modern carrot is other than, from evidence found in archaeological digs, some form of carrot, as in plants from the carrot family, existed back in the Eocene period (55 to 34 million years ago). After that, there is no actual written record of their use either for food or medicinal purposes until the Greeks and Romans, although the domesticated version of carrots (oh yes, I’ll tell you about that in a minute) are believed to date back to approximately 5000 B.C. in Afghanistan.
    So, to the issue of wild vs. domesticated carrots. When I first read that there were wild carrots and that the carrots we take for granted as simply being carrots are the hybridized and domesticated descendants of "wild" ones, I imagined a Mr. Potato Head version of a carrot wearing a loincloth and carrying a sharpened stalk of celery for a spear. It turns out that you probably know wild carrots by another name; they are commonly known as Queen Anne's Lace and are mostly considered to be a weed, albeit a pretty one; the root is tough, pale (most often white), bitter and quite small. Presumably, over thousands of years and many combinations, the modern, domesticated carrot evolved partially from the wild carrot, but attempts to create domesticated edible carrots -such as we know them- purely from wild carrots have failed, so the belief that domesticated carrots come entirely from wild ones is inaccurate.
    The first domesticated carrots that I mentioned above were purple and sometimes yellow. Through time and cross-cultivation, other colors appeared, first red, then white, then orange which became the most common form of carrot particularly in the West. They were brought to Europe by the Arabs in the 10th century, at which time the orange version did not yet exist, and it is thought that Western Europeans eventually developed the common orange-colored carrot some time around the 16th century.

    Now to the nutritive properties of carrots, which is really why you might still be reading this post:
    Carrots are phenomenally nutritious. They contain the most beta-carotene (unsurprisingly and that which gives carrots their orange color) of any fruit or vegetable which is converted to vitamin A by the body. They also are a source of vitamins B6 and C, and a pectin fibre known as calcium pectate which may have the ability to lower cholesterol. Carrots are loaded with potassium, thiamin, folic acid, and magnesium and when cooked also contain copper, iron, manganese, phosphorus and sulphur. The lesson here being that an apple a day is all well and good, but maybe you should consider eating some more of those carrots you have laying around. It's as easy as washing and peeling one. If you happen to get a bunch of carrots with their greens, those contain vitamin K which is not present in carrots themselves, so you might want to use those as well. It's all good.

    I used to hate cooked carrots when I was little, but realized in retrospect that that was only because my mother didn't cook them and the only cooked ones I had were often boiled to death and lacking any flavor. I've always loved them raw however, and now like them cooked as well. I've been making all of the carrots pictured above for my little noodle and she loves them, no matter the color or the manner in which they are cooked. It is thanks to her that I've discovered all of these things about carrots, and that I continue to discover things every day about foods I eat.
    Have you learned anything about foods you thought you knew from your children?


    This post was written by Hilda


    Are you interested in contributing to The Daily Tiffin? Drop us an email: thedailytiffin@gmail.com. We look forward to hearing your ideas.

    Roasted Potatoes and my trip to Aleppo

    Monday, November 09, 2009

    Posted by Antonio Tahhan

    note: I want to apologize to everyone for being late with this post. I am going out of town in a few days and have been running around like a crazy person trying to get everything in order before my trip.


    A couple weeks ago, I finally bought my plane ticket to go to Aleppo. My grandmother is there now, visiting her sister, and I will get to join them in just a few days. Middle Eastern food, like most of the food from around the Mediterranean, is extremely fresh and healthy. I promise to be back with lots of pictures and recipes that I will share on the Daily Tiffin.

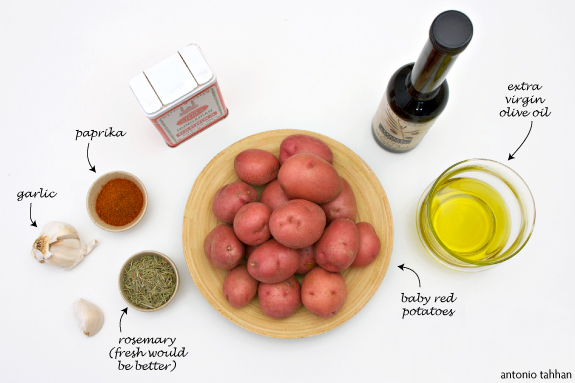
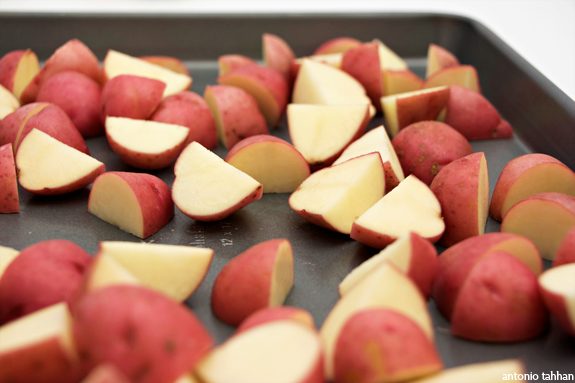
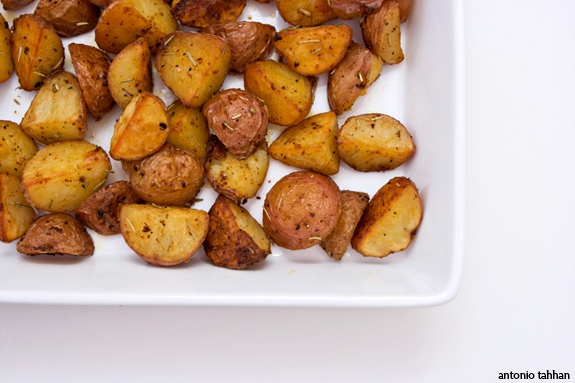
    In the mean time, I've been strategically trying to use up all my produce and perishables for the past couple of weeks. Today I chose to write about roasted potatoes because they're a healthy alternative to fried potatoes, but are still popular with the kids. They're great in lunch boxes or afternoon snacks, and easy enough to make in large batches. There are a few steps, however, to ensuring a perfect roast with an extra crispy exterior and ultra creamy inside.


    Preparation is simple. It makes a big difference to scout out good potatoes for this dish: small, firm and tight skin. I prefer reds simply because they have a higher sugar content, so they tend to caramelize better than other potatoes in the oven.


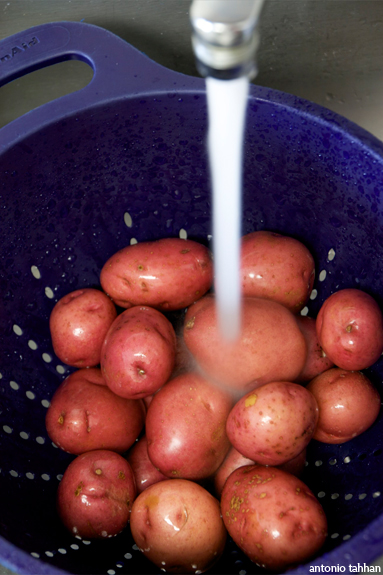
    Since potatoes grow underground, you'll want to give them a quick rinse before you roast them. Make sure to pat them dry so that the outsides crisp up.


    It's also important not to crowd the potatoes in a pan, otherwise they will still steam, regardless of how well you've patted them dry.


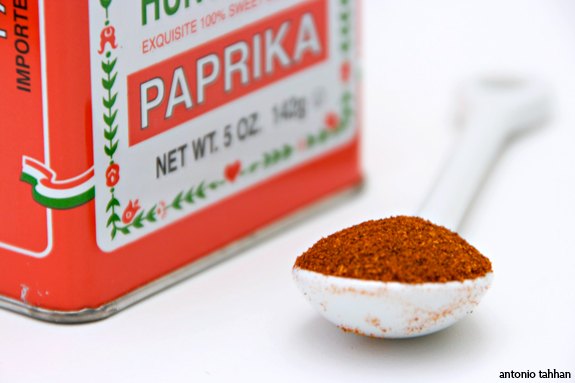
    Although I usually use Spanish paprika, or pimentón, it's a lot easier to find the Hungarian variety at my local grocery store. My inspiration for using paprika in my roasted potatoes came from patatas bravas -- a classic tapas made from fried tomatoes covered in a spicy pimentón-base sauce. If you can't find Spanish paprika near where you live, Amazon is where I usually buy from.


    Once they come out of the oven, they can be eaten hot or at room temperature. Enjoy!

    Click here for the recipe.


    This post was written by Antonio Tahhan


    Are you interested in contributing to The Daily Tiffin? Drop us an email: thedailytiffin@gmail.com. We look forward to hearing your ideas.

    Tiffin Tuesday - Getting Back Into The Habit

    Tuesday, October 20, 2009

    Posted by Anonymous

    It's been a long time since I've posted a bento here - or on my blog. It is not that I don't pack lunches any more, but... most days I just grab some leftovers, and an apple or banana, and a cereal bar, and I'm done.

    Although it is not quite 2010 right now, I think it is time to start over and make 'New Year's resolutions', to set up new goals, and get back to packing lunches which are not only nutritious, but also fun to look at. Even if you don't pack meals for a child but for an adult, enjoying your lunch visually is a great part of the food with love theme, I think.

    And it doesn't have to be elaborated, fancy food, or decorating stunning anime images on a rice bed (which I could never do, anyway):


    Here I packed tiny tomato halves with a tuna salad stuffing, tiny cucumber and carrot bites for crunch and color, a slice of buttered wholegrain bread (wrapped in cling film to prevent it from turning soggy), 3 mini chocolate muffins, dried mango, banana chips, the last of the plum harvest, and an apple. Basically a pantry raid, but looks so much better than just a sandwich or a box with noodle salad :-)

    So, when do you get back in the habit?


    This post was written by Petra


    Are you interested in contributing to The Daily Tiffin? Drop us an email: thedailytiffin@gmail.com. We look forward to hearing your ideas.

    FEEDING THE FINICKY

    Thursday, October 08, 2009

    Posted by Jamie

    MEET MR. PERSNICKETY

    Oh, happy the parent who has children who eat everything. Happy eaters are a joy to behold, watching as they merrily lick beaters and agree to taste test all cooking adventures. Pure pleasure is the child who digs the serving spoon into the bowl and piles it high on his/her plate, no matter that he/she has never eaten it before. Garlic, eggplant, carrots, mascarpone cream, preserved lemons or pumpkin desserts don’t lead to wrinkled brows, turned up noses and groans of disgust, but rather interest, excitement and licked lips.

    The persnickety child's dream!

    Clement was – and is – this kind of child. Maybe he was influenced by my diet when I was pregnant, a diet consisting of the savory and the spicy, couscous and tagines, stews and seafood creoles, the intense flavor seeping through my body to him, a baby growing into my adventurous tastebuds. Or maybe it is due to the fact that from the moment he could open his tiny mouth we would offer him tastes of everything soft and smooth, from fresh goat cheese to chocolate pudding, just a tad on the tip of our pinkie finger, enough to get a reaction. And the reaction was always one of pure pleasure. By the time he could sit in a high chair, he loved sucking on lemon slices or biting into cloves of garlic, he would suck down baby spoonfuls of everything that we cooked or baked for ourselves, a foodie in the making.

    And he always loved everything, cheeses, from the mild to the strong, exotic food from any culture, vegetables one and all, desserts both child-oriented and adult.

    And then came Simon. Ah, what do the experts say about this? This second pregnancy was punctuated by American fast food cravings and plates piled high with brownies. The tiny taste tests were mostly abandoned when he was a tot. And one day, out of the blue, he pressed his lovely pink lips together, crossed his baby arms and refused what was on the end of the fork. And life was never the same. Here was a child, adorable, sweet and mild-tempered, a child who simply said “no” to food, no to anything flavorful, anything out of the ordinary, his version of ordinary. Years followed, years of eating pasta in bianco or white rice, plain grilled fish drizzled with the smallest amount of olive oil, plain chocolate cake with a smattering of powdered sugar, simple, tiny cheese ravioli in brodo, chicken broth. Fruit he loved, almost all fruit, so mealtimes usually found Clem with a plateful of vegetables in front of him and Simon with a bowl of sliced strawberries and banana, grapes and cubes of apples or pears, anything to get the maximum mix of vitamins.

    As he’s grown, Mr. Persnickety, as I call him, has continued to eat simply, from pasta with red sauce to plates of white rice or unadorned couscous grains, spurning the fragrant, delicious veal blanquette or the lamb tagine that are served as the main course alongside these simple grains. He is wary of meat, dissecting it so minutely that it would make a forensic scientist proud, slicing off even the tiniest hint of fat. Vegetables get the old heave ho and most of what I cook is insulted with a “Oh, not that! Disgusting!” Fried foods and pizza, peanut butter or grilled cheese sandwiches, hamburgers and fries all pass with a thumbs up and desserts are limited to brownies and chocolate chip cookies, the most simple of chocolate cake or coffee cake with streusel. Simon was never so simple.

    Feeding your child can't always be a hold up!

    So how do we, the parent of the picky eater, how do we get our little darlings to eat anything healthy, anything vegetable, anything new? It becomes a game, a test: how to we package eggplant or spinach, fish or pumpkin in such a way that will actually have them eating it? Do we cook and serve them a separate meal or do we let them go hungry if they turn up their nose at what we have placed on the table? Or do we try and imagine dishes that may please, dishes that blend the loved with the hated in such a way that the persnickety child will finally put a forkful in his/her mouth and taste and maybe, just maybe, give a gentle shrug of the shoulders and say “it’s not bad”? And clean their plate. And make the foodie parent happy for one more meal. This is an ongoing project for me and I hope to be able, over the course of time and through my posts, I hope to be able to share some of these tasty dishes, successful meals, and there are indeed a few, with you.

    Have them eat better... and healthier than this!

    Greek-Inspired Spinach and Feta Triangles are easy to put together, if just a tad bit time consuming because of the phyllo/filo dough, and something that even my spinach-hating son, my finicky eater, will eat with pleasure (although he would never admit to the pleasure). I have made this at one time or another in one large baking dish, the filling sandwiched in between layers of filo dough, but wrapped in individual triangles makes it more fun to eat. Crunchy, buttery and delicious, chock full of feta cheese, add pine nuts or even chopped walnuts if you dare, this is a treat that everyone loves. It can be made in advance and stored in the fridge covered well with plastic wrap, just baking before serving.


    GREEK-STYLE SPINACH-FETA TRIANGLES

    1 1/2 lbs (800 g) fresh spinach, well-cleaned and coarsely chopped
    1 1/2 cups (235 g - one package) feta cheese, drained and crumbled
    1/2 cup (60 g) grated parmesan cheese, fresh when possible
    3 large eggs, lightly beaten (if you make this in pie form, use 4 eggs)
    2 Tbs chopped fresh mint
    1/2 tsp ground nutmeg
    freshly ground pepper and a dash of salt to taste
    1/2 lb (250 g, about 20 sheets) filo dough, thawed if frozen - if you make these 6 large triangles, you will need 12 sheets
    Melted butter for the filo


    Wash the spinach leaves, shake off excess water and put into a large pot with a tight-fitting lid. Steam the spinach until wilted, then pour into a colander to drain. Allow to cool until easy to handle. Press out all the excess water you can with your hands, then gather up the cooked spinach and place in the center of a clean but old cloth dishtowel. Wrap or roll up the spinach in the towel and squeeze for all you are worth, squeezing out as much water as possible. Place the spinach on a cutting board and chop.

    Put the chopped spinach in a mixing bowl, add the crumbled feta and parmesan cheeses, the chopped mint, nutmeg and salt and a good grinding of pepper (when adding salt, do so sparingly; remember that the feta is salty). Blend well. Now beat the eggs until well blended and stir them into the spinach-cheese mixture.


    Preheat the oven to 375°F (190°C).

    Now - the filo triangles. As you use each sheet of filo, keep the rest of the sheets covered with a just-damp towel so they don't dry out.

    Melt the butter and allow to cool a bit.

    Lay out the first sheet of filo with the wider length side to side, left to right. Brush the sheet quickly with butter. Lay a second sheet on top of the first and brush with butter. Repeat with a third sheet. With a very sharp knife, carefully slice from top to bottom into three equal strips. This will make the first three triangles.

    Divide the spinach mixture into 6 (like I did here) or more parts depending on whether you want to make more or less triangles.* Scoop up one quantity and place it on the edge of the first strip of filo closest to you. Now, to form a triangle, lift up the bottom edge and bring the right bottom corner up towards the left edge (side), lining up the bottom and side edges to form a triangle. Holding this in place, use your free fingers to push the spinach mixture so it fills the triangle shape. Lift this up and fold upwards and continue folding until you have only about an inch of filo dough at the top. Brush this with butter to moisten, fold it over and seal your triangle "package". Place the triangle on a parchment-lined or buttered baking sheet, sealed side down.


    Continue until you have made three triangles with the first three sheets of buttered filo. Repeat the process with three more buttered sheets and the rest of the spinach mixture. You now have 6 large triangles on your baking sheet. The triangles can be made ahead up to this point. Cover them well with plastic wrap and put into the fridge until ready to bake.

    Brush the surface of each of the triangles with more melted butter. Bake for 15 minutes until golden.


    * You can make this as one large pie, layering 8 - 10 of the buttered filo sheets in a buttered baking dish (the size of the dish depends on how thick you like the filling to be), spreading the spinach mixture evenly, then layering and buttering 8 - 10 more filo sheets on top. Bake until golden. Or you can make many more smaller triangles by cutting the filo dough either width- or length-wise into narrower strips.

    Serve large triangles for lunch or dinner with a salad or smaller triangles as finger food.


    This post was written by JAMIE


    Are you interested in contributing to The Daily Tiffin? Drop us an email: thedailytiffin@gmail.com. We look forward to hearing your ideas.

    The luxury of homemade Mascarpone...in a cake!

    Saturday, July 18, 2009

    Posted by Deeba PAB

    Have you tried making soft cheese at home?

    I've tried & I'm sold on the idea. Not only is it a much cheaper option, it's also a very satisfying process. Fresh cheese should be moist and white, with no sign of mold. The fat content of fresh cheese varies as they can be made from whole or skimmed milk, or even with cream. I've been on a soft cheese making spree these days, having been completely taken in by the luxury of homemade soft cheese, amazed at the freshness & smoothness. It's from Vera's Baking Obsession that I've tried homemade ricotta & mascarpone, both with outstanding results. Cottage cheese is something inherent to Indian culture, & is made in almost every home, ours too. My next attempt is going to be Quark, from a recipe @ Meeta's What's For Lunch Honey. I'm going to share a recipe for a cake I made using homemade mascarpone, a cake I made for my father's birthday. It was a delicious to goodness cake with a genoise sponge as the base. The crumb of the genoise was light, tender & moist, and a dousing of coffee syrup made it perfect! Sandwiched with a cream as luxurious & indulgent as homemade mascarpone, the cake was perfect. Just right - not exceedingly sweet, light, yet luxurious! I made the mascarpone 2 days in advance, the genoise a day in advance, & refrigerated both.

    HOMEMADE MASCARPONE CREAM
    as adapted from Baking Obsession
    Makes about 12 oz
    Ingredients:
    600ml low fat cream (25 %) pasteurized (not ultra-pasteurized), preferably organic cream
    1 tbsp fresh lime juice Method:
    Bring 1 inch of water to a boil in a wide skillet. Reduce the heat to medium-low so the water is barely simmering.
    Pour the cream into a medium heat-resistant bowl, then place the bowl into the skillet. Heat the cream, stirring often, to 190 F. It will take about 15 minutes of delicate heating.
    Add the lime juice and continue heating the mixture, stirring gently, until the cream curdles. Do not expect the same action as you see during ricotta cheese making. All that the whipping cream will do is become thicker, like a well-done crème anglaise. It will cover a back of your wooden spoon thickly. You will see just a few clear whey streaks when you stir.
    Remove the bowl from the water and let cool for about 20 minutes. Meanwhile, line a sieve with four layers of dampened cheesecloth and set it over a bowl. Transfer the mixture into the lined sieve. Do not squeeze the cheese in the cheesecloth or press on its surface (be patient, it will firm up after refrigeration time). Once cooled completely, cover with plastic wrap and refrigerate (in the sieve) overnight or up to 24 hours. CHOCOLATE GENOISE
    As adapted from this recipe @ Baking Obsession
    Ingredients:
    3 tbsp clarified butter/ghee
    1 tsp pure vanilla extract
    1/3 cup all-purpose flour
    1/3 cup unsweetened Dutch-process cocoa powder
    4 large eggs (I used 5 as the eggs were smallish)
    2/3 cup fine granulated vanilla sugar
    Method:
    Preheat the oven to 350F. Line, grease & flour an 8-inch round cake pan.
    Sift the flour and cocoa together three times; reserve.
    Bring some water to a boil in a large pan/griddle & reduce to simmer. Place eggs & sugar in a large bowl, whisk constantly over the simmering water, heat the eggs to lukewarm (about 105F). Remove the bowl from the pan; leave the skillet on the stove but turn off the heat. With an electric mixer, beat the egg mixture at high speed until it has cooled, tripled in volume, and resembles softly whipped cream, about 5 minutes in a heavy-duty mixer or longer with a less powerful mixer.
    Meanwhile, set the bowl of clarified butter/ghee and vanilla in the skillet of hot water, with the burner off, to keep it warm.
    Sift about one-third of the flour and cocoa over the whipped eggs. Use a rubber spatula to fold in the mixture-quickly but gently-until combined. Fold in half the remaining flour and cocoa, then fold in the rest. Remove the warm butter mixture from the skillet. Scoop about 1 cup of the batter into the bowl with the butter and fold together until completely combined. Use the large rubber spatula to fold the butter mixture completely into the remaining batter. Turn the batter into the prepared pan and tilt to level.
    Bake until the cake beginning to shrink slightly around the edges and the top springs back when pressed with your finger, about 40-45 minutes. Cool the cake completely in the pan on a rack.
    To unmold, run a small knife or spatula around the inner edges of the pan. Invert it onto a rack and remove the parchment liner. Turn the cake right side up. The génoise can be wrapped and refrigerated for up to 2 days, or frozen for up to 3 months.
    MOCHA MASCARPONE FROSTING
    Ingredients:
    12oz Mascarpone Cream (recipe above)
    200ml low fat cream (25% fat)
    1 tsp coffee powder (increase or omit as desired)
    2-3 tbsps ground vanilla sugar, or regular sugar (according to taste)
    Method:
    Beat mascarpone cheese with a wooden spoon till smooth. Fold in the rest of the ingredients & mix with the spoon till smooth. CHOCOLATE GENOISE CAKE with MOCHA MASCARPONE
    Ingredients:
    1 chocolate genoise sponge (recipe above)
    1 portion of Mocha Mascarpone Cream (recipe above)
    Coffee syrup
    Dark chocolate shavings, flakes & coffee beans etc to garnishTo assemble:
    Make a strong coffee syrup with 1/4 cup of hot water, 2-3 tsps sugar & 2 tsps coffee powder. Cool.
    Cut the genoise into 2 horizontal layers.
    Place one layer on the cake platter. Brush well with the coffee syrup. Sandwich with a little less than half the mocha mascarpone.
    Top with the second layer, & brush that well with the coffee syrup.
    Frost the top & sides of the cake with the remaining mascarpone. Grate dark chocolate over the top, edge with coffee beans, & sift cocoa over the edges.
    Chill for 3-4 hours.


    This post was Written by Deeba

    Are you interested in contributing to The Daily Tiffin? Drop us an email: thedailytiffin@gmail.com. We look forward to hearing your ideas

    Edible Flowers

    Thursday, July 09, 2009

    Posted by Andrea Meyers

    Andrea's Recipes - Johnny Jump Ups (violas)

    Flowers have long been used in cuisines around the world, including ancient Rome, Greece, and China, and the practice is once again growing in popularity. Growing your own edible flowers will add beautiful color to the landscape as well as delicious flavors to your table, and you can control the conditions and safety of your edible flowers by following organic cultivation practices.

    Precautions

    Not all common flowers are edible, and even some edible flowers can cause discomfort if consumed in large quantities. Daylilies can act as a diuretic or a laxative, and apple blossoms have cyanide precursors, so always research the type of flower you plan to use before adding it to food.

    Pesticides for flowers have not been tested to determine safety on food crops, so be very careful and make sure the flowers have not been sprayed with pesticides or other chemicals. For this reason you should avoid flowers from florists, nurseries, garden centers, and any growing by the roadside. Exercise caution if you have allergies, asthma, or hay fever as some flowers may cause a reaction.

    The following is a brief list of common edible flowers in North America, but this list is not exhaustive. For more detailed information, you may want to consult an authoritative book on edible flowers or contact your state’s university cooperative extension. You can find a list of poisonous flowers at Wikipedia.

    Herb Flowers

    basil
    chives
    dill
    lavender
    mint
    rosemary
    sage
    thyme

    Ornamental Flowers

    calendula
    carnations
    chamomile
    chrysanthemum
    daylilies
    impatiens
    Johnny-jump-up
    nasturtiums
    pansies
    scented geraniums
    tulips
    violets

    Andrea's Recipes - Tulips

    Trees & Shrubs

    apple
    fig
    hibiscus
    lilacs
    peach
    pear
    plum
    roses

    Vegetables

    arugula
    broccoli
    fennel
    okra
    squash

    References

    North Carolina State University, Department of Horticulture – Edible Flowers

    Iowa State University Extension – Reiman Gardens: Edible Flowers

    National Gardening Association – Edible Landscaping: Growing Edible Flowers in Your Garden

    Wikipedia – Edible flowers

    Wikipedia – Poisonous flowers


    This post was written by Andrea

    Are you interested in contributing to The Daily Tiffin? Drop us an email: thedailytiffin@gmail.com. We look forward to hearing your ideas.

    Gulkand

    Tuesday, June 30, 2009

    Posted by Indian Food Rocks

    It's no secret that I am a lazy gardener. I prefer to let wildflowers and native grasses rule my yard than spend hours tending to specialty flowers and plants. The few plants that I have brought into my yard are drought-resistant. My neighbor cultivates roses. He has blossoms of various colors on the same bush. Me? I love the wild rose, Rosa woodsii.


    It's a treat to see this wild rose in bloom as it lasts for just a day. If I could, I would have a thicket of wild roses to line my property but wilder things would leap over it, so I have abstained from taking it on. I do have a bush of hardy climbing roses that refuses to die. When it didn't bloom one year, I was rather thrilled because I had other plan(t)s for the coveted spot it is in, but it bounced back the following year and blooms profusely late spring through early summer.


    If I hadn't been consumed by bed bug bites during late spring last year, I might have noticed my climbing rose bush. This year, I did take notice: the flowers are small but they do have a pleasant fragrance. That, to my mind, translates into essential oils even though this is no damask rose. I figured that these roses might have at least some of the 300 compounds reported to be found in rose oil.

    While roses are generally not used in western cuisine, their culinary history can be traced back to Persia. Roses are used as flavoring agents in Middle Eastern as well as Indian cooking. Since I do not have the wherewithal to make rose water or extract rose oil, I decided to do the next best thing: make Gulkand in the sun, now that we have a respite from the incessant rains we have seen this spring. Gulkand is often referred to as rose petal jam but let's please just call it gulkand (Gul-kundh) - gul for rose and kand for sweet.

    My first task was to deadhead the bush. Once I had that out of the way, I took stock of the number of buds on the bush to make sure that I would have enough petals to justify making gulkand. Just opened blooms are best for gulkand so it's worth the effort to wake up early to pluck the flowers off the bush.

    Remove the petals gently, discarding petals that may be disfigured, have holes or appear to be eaten by insects. Also, discard the rest of the flower. Inspect closely to make sure there are no insects or other creatures that might inadvertently make it into your gulkand, making it not so vegetarian.

    Wash the petals several times and lay them out on a wad of paper towels. There is no need to pat them dry as any residual water will simply aid in making the sugar syrup.


    In an wide-mouthed jar, make layers of rose petals and sugar, pressing down with a spoon every so often and finishing off with a layer of sugar at the very top. Since my flowers were small, I arrived at the following estimate for a recipe:
    3-4 cups of rose petals
    3/4 to 1 cup of organic sugar
    3 cloves (optional)
    seeds of 1 cardamom (optional)

    I like the hint of spices in my gulkand so I added cloves and cardamom. Allow this to cook in the sun for at least two weeks. Open it up every other day, not just to get a whiff of the heady fragrance, but to mix it up, too.


    This little jar was overflowing when I put the lid on it. It whittled down to just about an inch thick in less than a day. I made two more jars of the same quantity and after a week of being in the sun, I combined them all into this same jar. It's been just over a week and I will update this post with a picture of gulkand as soon as it is ready. Until then, take a look at Anita's Gulkand.

    If you have roses that have not been sprayed - please do not use store-bought roses unless you know they are organic and safe for consumption - do give this a try. It's great as a summer activity for kids, too. Which kid doesn't like ripping petals off flowers? They can also take the responsibility for putting the jar out in the sun and bringing it in every day.

    Gulkand is supposed to have cooling properties and is best consumed in summer. And, supposedly a host of other benefits for the entire body. My parents sourced the purest and best gulkand for me to help cool my highly myopic eyes and perhaps even deter what genetics had in store for me. I can't say that it worked but I do know that unlike those awful Threptin biscuits that I launched off an 11th floor balcony or that terrible tasting Chyawanprash that followed a trajectory to the ledge under my bedroom window, gulkand made its way safely to my stomach with the spoon being licked clean each time!


    This post was written by Manisha

    Are you interested in contributing to The Daily Tiffin? Drop us an email: thedailytiffin@gmail.com. We look forward to hearing your ideas.