Showing posts with label Desserts. Show all posts

LA GALETTE DES ROIS

Wednesday, January 06, 2010

Posted by Jamie

A CAKE FIT FOR A KING!


The plate is set before me, the aroma of warm pastry and almonds whirls and swirls up and around my head. I inhale deeply and breath in all the goodness, the scent of cozy winter afternoons in front of a roaring fire, snowy days bundled up under a thick blanket, dog at my feet, a mug of hot tea in my hand and this delicacy, this thing of beauty placed before me. Layers upon layers of flaky golden pastry, its sugary, buttery flakes cradling a rich, rum-kissed almond cream in which hides a very special prize. And like all great French fashion, it comes with the perfect accessory: a golden crown.

Many of us are winding up the Christmas season by packing up the decorations, taking down the colored lights and disposing of the tree. The last of the turkey or ham has been sandwiched between bread and eaten, the fruitcake and panettone, the cookies and the stollen all devoured. The gifts have all been opened and enjoyed and the last card has been stamped, sealed and sent. Now is the 6th day of January, the Twelfth Day of Christmas, the Epiphany, Three Kings Day, the day, as the story goes, on which the Three Magi arrived in Bethlehem and carried gifts to the baby Jesus. To celebrate the occasion, the French fête this joyous occasion with a very special patisserie, la Galette des Rois, Kings’ Cake.

J-B Greuze, Le Gateau des Rois, 1774

We all know that many well-known and loved symbols and traditions of Christmas are originally of pagan origin: the decorated tree, mistletoe, the Yule log among others. In fact, during the early years of the religion, the Christmas festivities were actually pushed up to the end of the year to coincide with the Winter Solstice and thus overlapped the pagan Saturnalia, a most popular Roman celebration marked by rambunctious behavior, overall silliness and fun and games, somewhat more joyous than the usually solemn Christian celebrations. Little by little, the Christians absorbed some of the practices that highlighted these non-religious pagan festivities. It is thought that originally the day of Jesus’ birth, celebrated on December 25, was reserved for strictly religious observance while the Epiphany, January 6 was a day of celebration, the day of giving and receiving gifts, a day in which some of the less than religious practices were merged with the gift-giving of the Magi.

In France, this day, January 6, the Epiphany, is known as Le Jour des Rois, The Kings Day. And in France, this day is fêted by the eating of La Galette des Rois, the King’s Cake. This special cake of pâte feuilletée, puff pastry, filled with almond cream, frangipane, wasn’t always reserved for this day, but was eaten on most festive occasions when frivolity was called for. Little by little it found it’s way to representing the Epiphany and Kings Day. But did this grow out of the story of the Magi, the cake representing the Three Kings and their gifts or did it come from the Saturnalia celebrations whose parties were characterized by the tradition of the reversal of social roles in which the king became servant and the servant became king? Either way, tradition has it that a lucky charm, originally a, small fève or bean is buried in the almond cream before the top layer of puff pastry is placed atop the cake and then baked. When the cake is served, the youngest child of the party scoots underneath the table where he cannot see what’s on top of the table and as the cake is sliced the child shouts out the name of the recipient of each piece. Why? Because whoever finds the bean in his slice of Galette is crowned with the accompanying paper crown and is king for the day. And what is the role of the king, you ask? Why, to offer the guests another Galette! It’s a day of indulgence, frivolity and merry-making!


Legend has it that for quite a while the King, the person who had discovered the bean in his slice of cake, was obliged to buy a round of drinks for everyone in the room. But those who were too stingy to pay would often just swallow the bean with the cake to avoid being named, so somewhere during the 19th century the bean was replaced with a tiny ceramic charm, sometimes representing a religious figure but more than often not, a tiny charm simple or fancy. Collecting these charms soon became a craze and people today are known to search far and wide and spend crazy sums of money buying special charms for their collections.

A collection of fèves.

Beginning just after the New Year, glass cases in every French pastry shop are lined with Galettes des Rois, filled not only with the traditional almond cream but with chocolate or fruit fillings as well. Every year I buy one or two over the course of the week or two of their short-lived appearance and we all enjoy these wonderful, rich confections. But this year, I have decided to make my own! It starts with homemade puff pastry, easy to make although rather time consuming, or store bought if you like, and then simply filled with a luscious filling of ground almonds, softened butter, sugar and an egg and flavored with rum and vanilla, whipped together in the flash of an eye. And a fève of course.

Enjoy it, for the season is short.

GALETTE DES ROIS or KING’S CAKE
I referred to Julia Child’s Mastering the Art of French Cooking for quantities and procedure and then adapted to my own taste.

About 1 – 1 ½ lbs (500 g) puff pastry or two store-bought rounds *
2 ½ oz (70 g) sugar
2 oz (60 g) unsalted butter softened to room temperature
1 large egg
2 ½ oz (70 g) ground almonds
¼ tsp vanilla
1 Tbs rum
Egg wash (I yolk whisked with 1 tsp cold water)
Icing/powdered sugar for dusting the top of the Galette.

* I followed this recipe which yields 2 ½ lbs (1 kg) dough and I used a tad more than half of the prepared dough.

Prepare the Frangipane filling:
Beat the sugar and butter together until fluffy. Beat in the egg, the ground almonds, the vanilla and the rum. Add more vanilla or rum to taste, if desired. Place the filling in a small bowl covered with plastic wrap or in a lidded plastic container and refrigerate until ready to use. It needs to firm up before assembly the cake.

To prepare the Galette des Rois:
Roll out the puff pastry to a thickness of ½ inch (1 cm) and not less than 3/8 inch, long and wide enough to cut out two 8 or 8 ½-inch (21 cm) discs. Using a cake tin or plate of about 8- or 8 ½-inches (21 cm) diameter and using a very sharp knife, trace and cut out two discs. Place each disc carefully on parchement-lined baking sheets, cover with plastic wrap and let rest in the refrigerator for 30 minutes.

Stack remaining dough (don’t mash together into a ball as you would other dough), wrap in plastic wrap and store in the fridge for another use.

Preheat oven to 425°F (220°C).

Remove prepared rounds of puff pastry. Choose one to be the bottom of the cake a gently press with your fingers the edges out a bit to enlarge the circle slightly. Remove the chilled almond cream from the fridge and mound in the center of the bottom disc of dough. Press it flat and out, using the back of a soup spoon, leaving about 1 ½ inches (4 cm) border of dough free around the edges. Press a fève, a ceramic charm of some sort, or even an old-fashioned dried bean or a coin into the almond cream.

Paint this wide edge of the dough around the almond filling with the egg wash. Gently place the second disc of dough on top of the filling placing the top and bottom discs edge to edge (so the edges meet all the way around). Press to seal.

Place a bowl upside down on top of the discs – the bowl should come up to ½ to 1 inch from the edges. Using a sharp knife held perpendicular to the table, cut into the dough to create a scalloped edge to the cake. Now carefully carve a design into the top of the cake. Cut a small circle in the center of the top dough disc and insert a chimney (make a chimney out of parchment or foil or, as I did, use an upside down aluminum pastry bag tip).

Brush the top of the dough with egg wash. Place in the hot oven and bake for 20 minutes until the pastry is puffed up and golden brown. If you think the pastry is browning too quickly, simply lay a piece of foil over the top.

Reduce the oven temperature to 400°F (200°C) and continue baking for an additional 25 to 30 minutes until the sides of the pastry are also golden and crisp.

Remove the Galette from the oven and move the rack up one notch. Generously dust the entire top surface of the Galette with powdered sugar then place the pastry back in the oven. Now bake for around 5 minutes until the sugar has turned to a golden and very shiny glaze. Stand next to your oven and watch because (as you can see from mine) it turns to the perfect glaze very quickly then in the flash of an eye burns! You must watch so you can pull it out of the oven just as the last of the top turns a gorgeous golden and not leave it one second longer.


Allow to cool a bit. Serve warm (not hot). Make sure there is a child under the table while the host cuts the Galette and then passes each slice as the child calls out whom to serve. Have a paper crown ready to crown the King who finds the charm!


This post was written by JAMIE


Are you interested in contributing to The Daily Tiffin? Drop us an email: thedailytiffin@gmail.com. We look forward to hearing your ideas.

TWO HOLIDAYS IN ONE

Wednesday, December 09, 2009

Posted by Jamie

Tis the season to be jolly, according to one well-known holiday song. And it certainly is what with the swags of gaily-colored lights and the glittery garlands strung up and down the streets, the holiday music piped into shops and city squares adding a festive rhythm to your already bouncy step. Candy shop windows have become wonderlands of silver and gold, boxes tied up in plump velvet bows and crystal dishes filled with every chocolate delight. Toyshops greet you with fluffy cotton snowmen and jolly Santas prancing through the snow laden with gifts for all. Friends chattering non-stop about holiday meal preparations, the pies and the cookies, the turkeys and hams, the family flying in from the four corners of the earth to celebrate together amid laughter and seasonal joy.


And if you don’t celebrate Christmas? I know how easy it is to get swept up in the festivities, the bright lights and the wonderful culinary traditions. “I don’t celebrate Christmas” is often greeted with quizzical, confused looks and “Why not?” follows the surprise. For many, this holiday is universal, a sharing of love and human kindness, the excitement of decorating and the pleasure of giving and receiving gifts. Yet when raising children in another culture or religion, how does one balance the traditional/religious side of Christmas with the non-religious commercial side, that part of Christmas that kids see others celebrating, and often watch enviously from afar?

I have tried to raise my children in a Jewish home, yet they have celebrated the odd Christmas whenever they spent their winter holidays with their French grandparents: chopping down, dragging home and then decorating the tree, pulling out tiny figurines and setting up the crèche in front of the fireplace, hanging stockings and receiving Christmas gifts directly from the hands of Jolly Old St Nick (le Père Noël or better known as Tonton Claude!), and eating their fare share of Bûche de Noël and marrons glacés. We even had a small tree once or twice in honor of their heritage and their grandparents, but the real excitement and joy seeped into our house at Hanukkah time: the boys drew and cut out Maccabees and Assyrians when they were small, creating a cardboard version of the great battle scene in which the tiny Jewish army, made up of a band of brothers, defeated the powerful, well-armed great Greek Syrian army who were out to wipe out the Jews; and still every year the boys pull out these tiny figures and line them up on the dining room buffet, they hang glittery, shiny garlands of silver and blue and prepare the two Menorahs (one for each of them to light). This is the Festival of Lights, the holiday in which we are reminded of the destruction of the Holy Temple in Jerusalem by that mighty Assyrian army and the oil in the Holy Eternal Light that burned for eight days instead of one until more oil could be prepared. We therefore light candles on a Menorah, the special holiday candelabra, for eight nights, starting with one candle on the first night, and adding one more each night. On the eighth and final night of Chanukah, all the candles are lit. And, of course, there is a gift on each night, with the lighting of each candle. And lots of latkes, the traditional treat of Hanukkah, fried potato pancakes eaten with fresh applesauce.


Yet, how to deal with the Christmas season for those of us who don’t celebrate this holiday? Food is always my way! Bring in a little of that Christmas cheer by baking puddings and cakes, stollen, panettone, gingerbread men and whatever other little goodies and treats that can be baked and offered to your loved ones. The kids can bring in their friends to share in the holiday goodies or pack them up and dole them out to neighbors and colleagues. And why not mix it up? Here is my absolute favorite cut-out cookie recipe, buttery sweet and tender, never crumbly and dry: every year I pull out my Hannukah and Christmas cookie cutters: the Star of David, the Menorah and the Dreidl along with the sleigh and reindeer and Santa cookie cutters. Glazed and sprinkled with colored sugar or rolled in nuts or simply eaten plain, these are the best cookies ever!


This year I’ve made my traditional Hanukkah cookies, drizzled with white chocolate and sprinkled with blue, but for the Christmas in me, I’ve used my ruffled cutters in 4 sizes to create a Christmas tree. Once cut out, I brushed the edges of the shapes with a bit of beaten egg then dipped them carefully in crushed green pistachio nuts to give the idea of a fir tree. They baked up perfectly! I then sandwiched them together with “snow”, a fluffy lemony mascarpone-goat cheese cream with plenty of whipped cream folded in. I piled up the layers then sprinkled them with a little bit of gold sugar crystals and some gorgeous pink praline, a gift from Pam.


HOLIDAY CUT OUT BUTTER COOKIES

2 sticks (1/2 lb, 225 g) unsalted butter, softened to room temperature
¾ cup (150 g) sugar
2 large eggs
¼ tsp salt
1 Tbs Amaretto (optional)
½ tsp vanilla – use 1 tsp if omitting the Amaretto
3 ½ cups (525 g) flour

In a large mixing bowl, cream together the softened butter and the sugar until light and fluffy.

Add the eggs one at a time, beating briefly after each addition just to incorporate.

Beat in the salt, the Amaretto and vanilla and then about a third of the flour until smooth. Gradually beat in as much of the remaining flour as possible using the electric beater, then stir in the rest with a wooden spoon or a spatula.

Turn out onto a lightly floured surface. If you haven’t stirred in all of the flour you can knead in the rest quite easily. Once you have a smooth, homogeneous dough, wrap tightly in plastic wrap and let it chill in the refrigerator for at least 30 minutes.

Preheat the oven to 350°F (180°C).

Working with about half the dough at a time, roll it out to a thickness of not less than 1/8-inch (no less than .3 cm), being careful that the dough is very evenly rolled out. Carefully cut out shapes with your cookie cutters. Gently transfer to a cookie sheet (I use unlined, ungreased cookie sheets with no problem at all). If you want the fir tree effect, just gently lift the cookies one by one, brush around the edges with a beaten egg, then dip in crushed pistachio nuts before placing on the cookie sheets. I also brushed my Hanukkah cookies very lightly with egg wash and doused them with colored sprinkles.

Bake for about 10 minutes. They will be set and appear cooked but they will NOT brown. You’ll know they are cooked because they will slide right off the cookie sheet when just nudged with a spatula.

Allow to cool. You can now frost them or drizzle with melted chocolate as I have done.


MASCARPONE-GOAT CHEESE LEMON CREAM
This is adapted from a recipe I found on Meeta’s blog What’s for Lunch Honey?

7 oz (200 g) mascarpone cheese, drained
1 oz (30 g) fresh, tangy goat cheese, drained
2 Tbs (30 g) superfine sugar
Finely grated zest of ½ lemon
1/8 tsp ground cinnamon
½ tsp Limoncello

¾ - 1 cup (about 200 ml) heavy whipping cream
Edible decorations (colored sugar, chopped nuts, etc)

Make the Lemon Mascarpone Cream:
Place the mascarpone, the goat cheese, the sugar, zest, cinnamon and Limoncello in a mixing bowl and beat until smooth and creamy. Chill.

Have the Lemon Cream, the whipping cream as well as the glass bowl and beaters for beating the whipped cream very well chilled before making the “snow”.

When ready to make the Cookies and Cream Christmas Tree, beat the heavy cream in the chilled bowl with the chilled beaters until thick. Using the same beaters, beat the Lemon Mascarpone Cream briefly (in a large bowl) just to loosen it and make it smooth and creamy after chilling in the fridge. Add the whipped cream to the Lemon Mascarpone Cream and beat briefly to blend and thicken.
To create the Cookies and Cream Christmas Tree:

Simply pile up the various-sized ruffled cookies which had been trimmed in chopped green pistachio nuts from largest to smallest, placing a large dollop of snow/lemon cream carefully in the center of each cookie round before placing another cookie on top. Decorate by sprinkling the snow with colored sugar decorations.


This post was written by JAMIE


Are you interested in contributing to The Daily Tiffin? Drop us an email: thedailytiffin@gmail.com. We look forward to hearing your ideas.

The luxury of homemade Mascarpone...in a cake!

Saturday, July 18, 2009

Posted by Deeba PAB

Have you tried making soft cheese at home?

I've tried & I'm sold on the idea. Not only is it a much cheaper option, it's also a very satisfying process. Fresh cheese should be moist and white, with no sign of mold. The fat content of fresh cheese varies as they can be made from whole or skimmed milk, or even with cream. I've been on a soft cheese making spree these days, having been completely taken in by the luxury of homemade soft cheese, amazed at the freshness & smoothness. It's from Vera's Baking Obsession that I've tried homemade ricotta & mascarpone, both with outstanding results. Cottage cheese is something inherent to Indian culture, & is made in almost every home, ours too. My next attempt is going to be Quark, from a recipe @ Meeta's What's For Lunch Honey. I'm going to share a recipe for a cake I made using homemade mascarpone, a cake I made for my father's birthday. It was a delicious to goodness cake with a genoise sponge as the base. The crumb of the genoise was light, tender & moist, and a dousing of coffee syrup made it perfect! Sandwiched with a cream as luxurious & indulgent as homemade mascarpone, the cake was perfect. Just right - not exceedingly sweet, light, yet luxurious! I made the mascarpone 2 days in advance, the genoise a day in advance, & refrigerated both.

HOMEMADE MASCARPONE CREAM
as adapted from Baking Obsession
Makes about 12 oz
Ingredients:
600ml low fat cream (25 %) pasteurized (not ultra-pasteurized), preferably organic cream
1 tbsp fresh lime juice Method:
Bring 1 inch of water to a boil in a wide skillet. Reduce the heat to medium-low so the water is barely simmering.
Pour the cream into a medium heat-resistant bowl, then place the bowl into the skillet. Heat the cream, stirring often, to 190 F. It will take about 15 minutes of delicate heating.
Add the lime juice and continue heating the mixture, stirring gently, until the cream curdles. Do not expect the same action as you see during ricotta cheese making. All that the whipping cream will do is become thicker, like a well-done crème anglaise. It will cover a back of your wooden spoon thickly. You will see just a few clear whey streaks when you stir.
Remove the bowl from the water and let cool for about 20 minutes. Meanwhile, line a sieve with four layers of dampened cheesecloth and set it over a bowl. Transfer the mixture into the lined sieve. Do not squeeze the cheese in the cheesecloth or press on its surface (be patient, it will firm up after refrigeration time). Once cooled completely, cover with plastic wrap and refrigerate (in the sieve) overnight or up to 24 hours. CHOCOLATE GENOISE
As adapted from this recipe @ Baking Obsession
Ingredients:
3 tbsp clarified butter/ghee
1 tsp pure vanilla extract
1/3 cup all-purpose flour
1/3 cup unsweetened Dutch-process cocoa powder
4 large eggs (I used 5 as the eggs were smallish)
2/3 cup fine granulated vanilla sugar
Method:
Preheat the oven to 350F. Line, grease & flour an 8-inch round cake pan.
Sift the flour and cocoa together three times; reserve.
Bring some water to a boil in a large pan/griddle & reduce to simmer. Place eggs & sugar in a large bowl, whisk constantly over the simmering water, heat the eggs to lukewarm (about 105F). Remove the bowl from the pan; leave the skillet on the stove but turn off the heat. With an electric mixer, beat the egg mixture at high speed until it has cooled, tripled in volume, and resembles softly whipped cream, about 5 minutes in a heavy-duty mixer or longer with a less powerful mixer.
Meanwhile, set the bowl of clarified butter/ghee and vanilla in the skillet of hot water, with the burner off, to keep it warm.
Sift about one-third of the flour and cocoa over the whipped eggs. Use a rubber spatula to fold in the mixture-quickly but gently-until combined. Fold in half the remaining flour and cocoa, then fold in the rest. Remove the warm butter mixture from the skillet. Scoop about 1 cup of the batter into the bowl with the butter and fold together until completely combined. Use the large rubber spatula to fold the butter mixture completely into the remaining batter. Turn the batter into the prepared pan and tilt to level.
Bake until the cake beginning to shrink slightly around the edges and the top springs back when pressed with your finger, about 40-45 minutes. Cool the cake completely in the pan on a rack.
To unmold, run a small knife or spatula around the inner edges of the pan. Invert it onto a rack and remove the parchment liner. Turn the cake right side up. The génoise can be wrapped and refrigerated for up to 2 days, or frozen for up to 3 months.
MOCHA MASCARPONE FROSTING
Ingredients:
12oz Mascarpone Cream (recipe above)
200ml low fat cream (25% fat)
1 tsp coffee powder (increase or omit as desired)
2-3 tbsps ground vanilla sugar, or regular sugar (according to taste)
Method:
Beat mascarpone cheese with a wooden spoon till smooth. Fold in the rest of the ingredients & mix with the spoon till smooth. CHOCOLATE GENOISE CAKE with MOCHA MASCARPONE
Ingredients:
1 chocolate genoise sponge (recipe above)
1 portion of Mocha Mascarpone Cream (recipe above)
Coffee syrup
Dark chocolate shavings, flakes & coffee beans etc to garnishTo assemble:
Make a strong coffee syrup with 1/4 cup of hot water, 2-3 tsps sugar & 2 tsps coffee powder. Cool.
Cut the genoise into 2 horizontal layers.
Place one layer on the cake platter. Brush well with the coffee syrup. Sandwich with a little less than half the mocha mascarpone.
Top with the second layer, & brush that well with the coffee syrup.
Frost the top & sides of the cake with the remaining mascarpone. Grate dark chocolate over the top, edge with coffee beans, & sift cocoa over the edges.
Chill for 3-4 hours.


This post was Written by Deeba

Are you interested in contributing to The Daily Tiffin? Drop us an email: thedailytiffin@gmail.com. We look forward to hearing your ideas

THERE'S SOMETHING ABOUT YOGURT...

Thursday, April 16, 2009

Posted by Deeba PAB

There's something about YOGURT, & I'm hooked to it. Sometimes I think I'm taking it too far, & substituting cream with yogurt too often, but it's a habit that grows on you. On indulgent days my panna cotta will have cream, but otherwise, it'll have a thick hung yogurt, referred to here as 'curd cheese' or 'shrikhand'. Yogurt is the most versatile ingredient in my fridge, & the benefits are manifold. Amongst others, yogurt
  • may help you to live longer, and may fortify your immune system
  • can significantly improve the cholesterol profile
  • contains lactoferrin, an iron-binding protein that boosts the growth and activity of osteoblasts (the cells that build bone)
  • has Lactobacillus, a probiotic (friendly) bacteria which offers "remarkable preventive and curative" effects on arthritis
  • strengthens the immune system
  • is helpful in the battle against ulcers

Chocolate Yogurt Cake

Yogurt is a very good source of iodine, calcium, phosphorus, and vitamin B2. It is also a good source of protein, vitamin B12, potassium, molybdenum, zinc and pantothenic acid. These 10 nutrients alone would make yogurt a health-supportive food. Some of the most interesting health information about yogurt comes from its potential inclusion of live bacteria.

It's no secret at home that I make my ice-creams/frozen yogurt desserts, my egg less cheesecake & sour cream etc with yogurt, & the results are delicious. Might well be a good idea to introduce kids to a 'yogurt habit' when young. Mine have been hooked on to it since they were very young. Come summer, winter, spring or fall, there has to be fresh, home-made, chilled yogurt every single day. The daughter isn't so much of a yogurt addict any more (teen thingy?), but the son is a complete 'yogurt freak'! He eats 2-3 bowlfuls with every meal, just plain, sans sugar. The daughter will usually add a tsp of sugar but wolf it down anyway. I set 2 litres of yogurt every alternate day... it's that much part of our existence!! I use it in sauces, in kebabs & curries, in lassi (sweet & sour), to make dips, to make sour cream, to make my cheesecakes (with eggs & without), to make ice-cream, to make chocolate yogurt cake, to make muffins...oh the list is endless! Here's a simple David Levobitz recipe I adapted. It might be a good way to introduce yogurt to frozen desserts this summer, but be warned, it's very addictive. And oh yes, you don't need an ice-cream machine to make this one!

Frozen Strawberry Yogurt
Adapted from David Levobitz
Ingredients:
1 cup (240g) hung curd
1 pound (450g) strawberries, rinsed and hulled
2/3 cup (130g) sugar
1 teaspoon fresh lime juice
Method:
Tie the yogurt in a cheesecloth and let it sit in a strainer in a bowl overnight or for at least 2 hours. This will help drain off all the whey and result in a very creamy frozen yogurt dessert. (I find overnight a better option)
Cut the strawberries and toss them in the sugar until the sugar begins to dissolve. (I used vanilla sugar).
Blend it together to a puree. (Strain if you don't like the seeds in)
Next, blend in the yogurt and lime juice until the mixture is smooth. Adjust the sweetness if required.
Freeze the mixture in a wide dish or plastic container. (The larger the surface area, quicker the freezing – since we have to pulse this mixture a couple of times).
Keep checking on the mixture every 30 minutes or so and use the stick blender to break the icicles, 4, maybe 5 times. (I used a sturdy whisk).
Once it's almost set, you can add a handful of finely chopped fresh basil, or else, some chopped pistachio nuts if you like. Just plain is good too!
Garnish with sliced strawberries & a sprig of basil, or, chopped pistachio nuts & mint!


This post was written by Deeba


Are you interested in contributing to The Daily Tiffin? Drop us an email: thedailytiffin@gmail.com. We look forward to hearing your ideas.

Diwali Sweet Treats

Thursday, October 23, 2008

Posted by Meeta K. Wolff

diwali
Image Source: stock.xchng.com In Prayer

This year Diwali falls on October 28th and many of our Indian readers are probably busy getting ready for this spectacular festival.

Diwali or Deepawali is celebrated by Indians all across the globe and is celebrated for five consecutive days at the end of Hindu month of Ashwayuja. Of all the several colorful festivals India offers throughout the year, Diwali is the most vibrant, fun and glamorous festival of all.

It usually occurs in October/November, and is one of the most popular and eagerly awaited festivals in India. Also known as the Festival of Lights, Indians will decorate their houses with lights, candles and lamps - or as they are traditionally known in India - diyas. The lights and lamps signify the lighting of darkness and victory of good over the evil within.
Traditionally a Hindu festival, Jains and Sikhs alike regard it as a celebration of life and use the occasion to strengthen family and social relationships.

There are several beliefs as to the origin of the holiday. The most common version is that Hindus celebrate Diwali to mark the time when Lord Rama achieved victory over Ravana. Hindus believe that whenever the power of evil increases in the world, Vishnu comes down to earth in a different form to defeat evil. These forms are called Avataras. Krishna and Rama are the popular Avataras of Vishnu. Diwali celebrations are especially a time for telling stories - about Vishnu and his wife Lakshmi, about Krishna, Rama and his wife Sita and any other tales that personifies the good winning over evil.

For us Indians, this festival means connecting with family and friends and what a better way than to do it with food and sweets. Diwali is a period that marks new beginnings. Houses are thoroughly cleaned, a kind of Spring cleaning in Autumn, and re-decorated. The courtyards in Indian homes are decorated with rangoli, which are vibrant patterns created with powdered or wet paint. Doorways and adorned with decorative garlands made with the traditional gold marigolds and fresh mango leaves. 

The kitchen becomes the hub for many households’ days before Diwali. Sweets, savories and snacks are made, lavish dinners are prepared, it truly is a festival unlike many others I have experienced. No expenses are spared, and everybody buys the best ingredients that is affordable to them.

As I know many of our Indian readers will be busy looking for ideas, I decided to put together a few great ideas for sweet treats I found while blog surfing.

Sweets


Indian sweets, which is known as 'mithai', are made with a variety of ingredients like semolina, wheat flour, chickpea flour or thickened milk, to which freshly grated coconut, carrots or white pumpkin is sometimes added. The mixtures, which are perfumed with sweet spices like cardamom and nutmeg, and embedded with nuts and raisins, are shaped into colorful shapes. All these processes - preparing, consuming and giving of sweets – are significant facets of the festival.

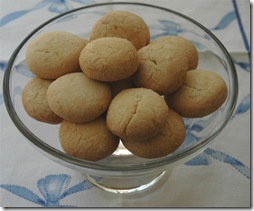
Nankatai Image courtesy of The Cooks Cottage Nankatai is a lovely flaky and buttery biscuit. They are typically served when the guests arrive around tea time. I found a perfect recipe for these delicate biscuits at The Cooks Cottage who makes her Nankatai recipe with saffron and cardamom.

Besan Laddoos are small balls of sweet heavenly delights. They are made by gently roasting gram flour and flavored with cardamom. Besan laddoos are extremely popular in India and are served as a simple sweet treat or as a bring along when visiting friends. Asha of Foodie’s Hope shares her delicious recipe for besan laddoos made the traditional way, by roasting the gram flour. However if you are looking for a quick method Nandita offers a great 5 minute beasan laddoo version.

Coconut Burfi is a lovely soft, chewy sweet often presented as a gift during festivities in India. Indira of Mahanandi makes a great version of the coconut burfi, without the addition of milk or ghee. She simply uses two coconuts, which she grated and adds cardamom for a gorgeous aroma. If you prefer a fruitier version over at Red Chillies you’ll find a rather scrumptious mango coconut burfi.

Sheera is a warm sweet very much like fudge, which is made using semolina, saffron, cardamom, raisins and nuts. There are several great recipes, some using fruit to flavour the sheera. One I found to be beautifully authentic was this Sheera recipe from Food for ThoughtGajarHalwa 05.

Kheer – a gorgeous milky rice pudding, made with rice, rice flakes or sago. Deeba provides us with delicious kheer, spiced with cardamom, nutmeg and saffron.

Gajar Ka Halwa is a silky carrot pudding, which is one of India’s most popular desserts.  There are several variations for this delectable dessert. My version is one I got from my grandmother. Using khoya, my gajar ka halwa adds a nutty mix of pistachios, cashews and almonds and uses very little sugar.

That was my quick tour of the blog-o-world of Diwali sweet treats, especially for you.

We from the Daily Tiffin team wish all celebrating Diwali a peaceful and joyous festival. Enjoy the time with family!


Are you interested in contributing to The Daily Tiffin? Drop us an email: thedailytiffin@gmail.com. We look forward to hearing your ideas.

This Post was written by Meeta

The Great Pumpkin

Monday, October 13, 2008

Posted by Mike of Mike's Table

When I was a child, I had an unexplainaible but strong aversion to pumpkin. All it was good for was making jack o'lanterns on Halloween, period. How could anyone possibly eat these things--they're not food! The pulp was merely a nuissance that slowed down carving a face on the pumpkin and the seeds were just garbage.

As with many things, I've come to realize how very wrong I was. First off, pumpkins are obviously food--very good food, as a matter of fact. They're another gourd-like type of squash which, like tomatoes, are one of those things you'd never think to call a "fruit." They can come in all shapes and sizes, whether it be a tiny one pounder or obsenely large 1,000+ lb beasts. There are more varieties than I can count, but as far as your kitchen is concerned, you generally want the smaller varieties (e.g. called "sugar pumpkin," "pie pumpkin," etc.) rather than the giants you carve faces in as there is a big difference in flavor (namely a lack of it in the bigger ones--trust me, I've tried). As for health benefits, the orange color ought to give this one away: they're loaded with lutein, alpha, and beta carotene, which means vitamin A to you and I. And the seeds that I maligned as a child are a great source of protein, zinc, and other vitamins.

Pumpkin factoids aside though, the real issue is how did I ever spend all those years blowing off a sweet slice of pumpkin pie? Why was I going for peanuts and sunflower seeds when I could have opted for toasted, spiced pumpkin seeds? I'm definitely making up for lost time this season. Every week now, I leave the grocery store with a few pumpkins so I can break them down and make pumpkin puree so I have it handy throughout the week (yes, you can always buy canned, but I personally think has a tinny taste, and really, making it fresh is very easy to do and requires very little of your time in the kitchen. You can make a lot, bag it up, and freeze it, too, taking it out as you need it).

Of course, there's a lot more to enjoying pumpkins than the traditional pumpkin pie and toasted seeds. You could make muffins, rice pudding style risottos, cookies, macarons, ice cream, or donut holes. Armed with pumpkin puree, the only real limit to pumpkin-based sweets is your imagination. Of course, you aren't limited to sweets, either. You could try a loaf of bread, savory pumpkin pie, pumpkin wild rice soup, pumpkin gnocchi, or even try your hand at Afghani cuisine and make kaddo bourani. Its surprisingly versatile and I certainly will have a lot of new pumpkin-centric recipes to share this season, both sweet and savory.

How do you enjoy this autumn fruit?


Are you interested in contributing to The Daily Tiffin? Drop us an email: thedailytiffin@gmail.com. We look forward to hearing your ideas.

This Post was written by Mike from Mike's Table


Family Foraging - more reasons to celebrate Autumn

Monday, September 17, 2007

Posted by Amanda at Little Foodies


I know, I know... it's just that I love Autumn... We've now been out for several Autumnal walks which have incorporated a little foodie foraging along the way. Our best haul were lots of yummy blackberries and I do believe I promised a blackberry recipe in my last post.


Blackberry and Apple Crumble (could serve 8)
3-4 cups of blackberries
2-3 cups of peeled, chopped cooking apples
2 cups of fruit juice
200g/7oz plain flour
125g/4.5oz butter cut into cubes (I use whatever we have, salted or unsalted)
75g/3oz caster sugar (we use unrefined)
2 dessertspoons of brown sugar
(Extra sugar if you like your fruit to be sweet too. We prefer it to be slightly tart and therefore do not add sugar to the fruit).

Preheat oven to 180C/350F/Gas Mark 5
You could use one large ovenproof bowl or individual bowls.
Into the ovenproof bowl add washed blackberries and chopped apples and the fruit juice. (If you like your fruit to be sweet then sprinkle some sugar over the top of the fruit, we prefer it to taste slightly tart and therefore don't add sugar).
In a separate, large mixing bowl add the flour and cubes of butter and with your hands rub them together until it resembles fine breadcrumbs. Add the caster sugar and give it a quick mix with your hands. Add the brown sugar and quick mix. Sprinkle this over the fruit and then cook in the oven for approximately 30-45 minutes until the top is a lovely golden brown colour.


Are you interested in contributing to The Daily Tiffin? Drop us an email: blogmeeta@gmail.com. We look forward to hearing your ideas.

This Post was written by Amanda from Little Foodies